
Countries GraphQL API Integration Using the APIs feature in the Toolkit
In this tutorial, we demonstrate API integration using the ComUnity Developer Toolkit, leveraging its APIs feature to connect with a third-party GraphQL API. The APIs feature is powered by Azure API Management (APIM) and enables structured API registration, management, and controlled data exposure within the Toolkit.
Instead of starting from scratch, we will use a predefined template project to accelerate development, allowing us to focus on integrating external data via GraphQL.
A core aspect of this tutorial is understanding how to integrate and query a GraphQL API in the Toolkit. We will use the Countries API to fetch and display country data, demonstrating the flexibility of the APIs feature when working with different API types.
This tutorial integrates the Countries API, an open-source project developed by Trevor Blades. The API provides country, continent, and language data and is available under the MIT license.
🔗 GitHub Repository: Trevor Blades - Countries GraphQL API
We appreciate the availability of this public API, which allows developers to explore GraphQL queries in a real-world use case.
Before You Begin
If you are new to the APIs feature in the Toolkit, we recommend first reviewing the JSONPlaceholder Todos API tutorial, which covers similar API integration concepts using an HTTP-based REST API. This GraphQL tutorial builds upon the same workflow, with adjustments specific to GraphQL queries and resources.
What You’ll Learn
By the end of this tutorial, you will:
Register and configure a GraphQL API in the ComUnity Developer Toolkit.
Define a Virtual Entity to model external country data from the API.
Expose the API via WebApiConfig and Custom Classes for structured data interaction.
Query and display country data using GraphQL queries within the Toolkit.
Prerequisites
Access Requirements
A ComUnity user account with the necessary permissions (contact ComUnity Support if required).
A single-tenant environment is required for API integration (organisations must host their own instance of the Toolkit in Azure).
If a single-tenant instance is unavailable, users can request access to the shared ComUnity Platform environment (API management is not supported in this environment).
Technical Knowledge
C# programming skills
Familiarity with WCF Data Services, Entity Framework, and OData
Development Tools
Visual Studio 2022 (Community, Professional, or Enterprise)
Project Setup Before proceeding with the GraphQL API integration, ensure that you have:
Created a project from a template – Follow the Create a Project section to set up a new project using the Smart City template.
Built and launched the project successfully.
Registered a user account in your app – Sign up and log in within your app
Once your project is ready, you can proceed with configuring the GraphQL API.🚀
Integrate the Countries API using APIs
To configure the GraphQL API in the ComUnity Developer Toolkit, follow these steps:
Obtain the GraphQL Specification Document
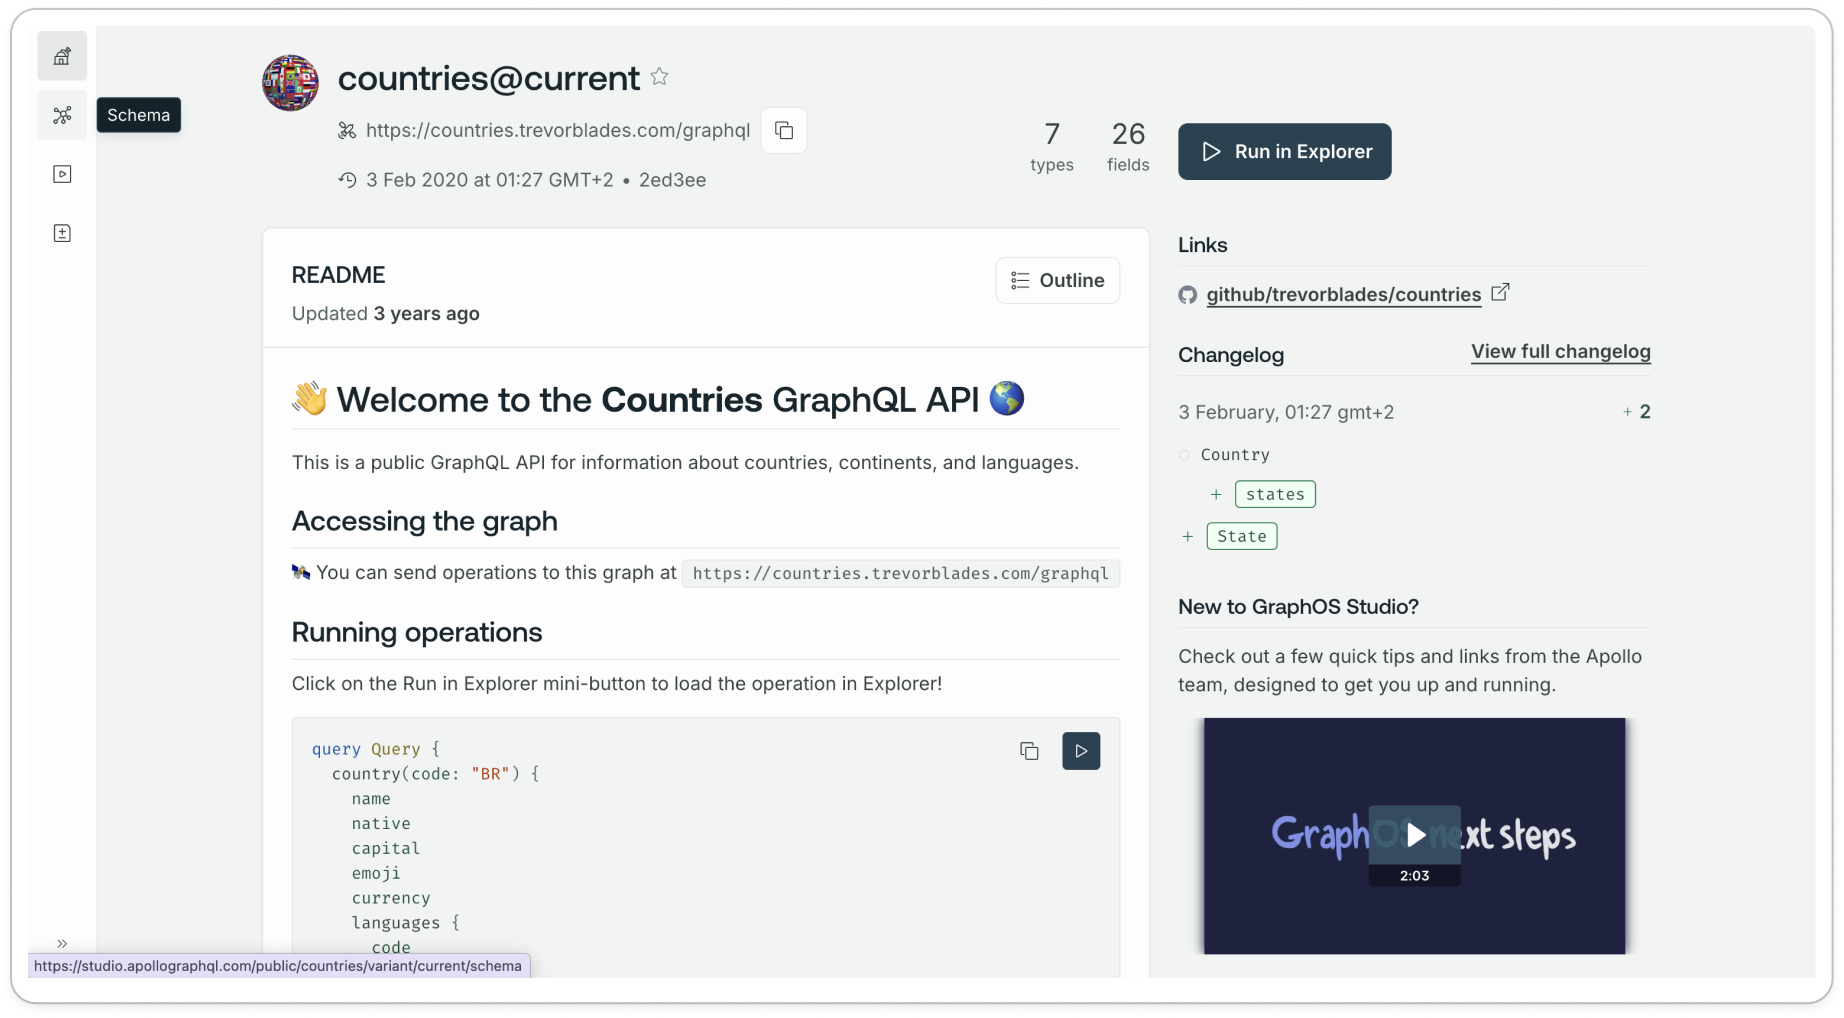
Open the Apollo GraphQL Playground for the Countries API.
Click the Schema icon in the left panel.
Select the SDL tab.
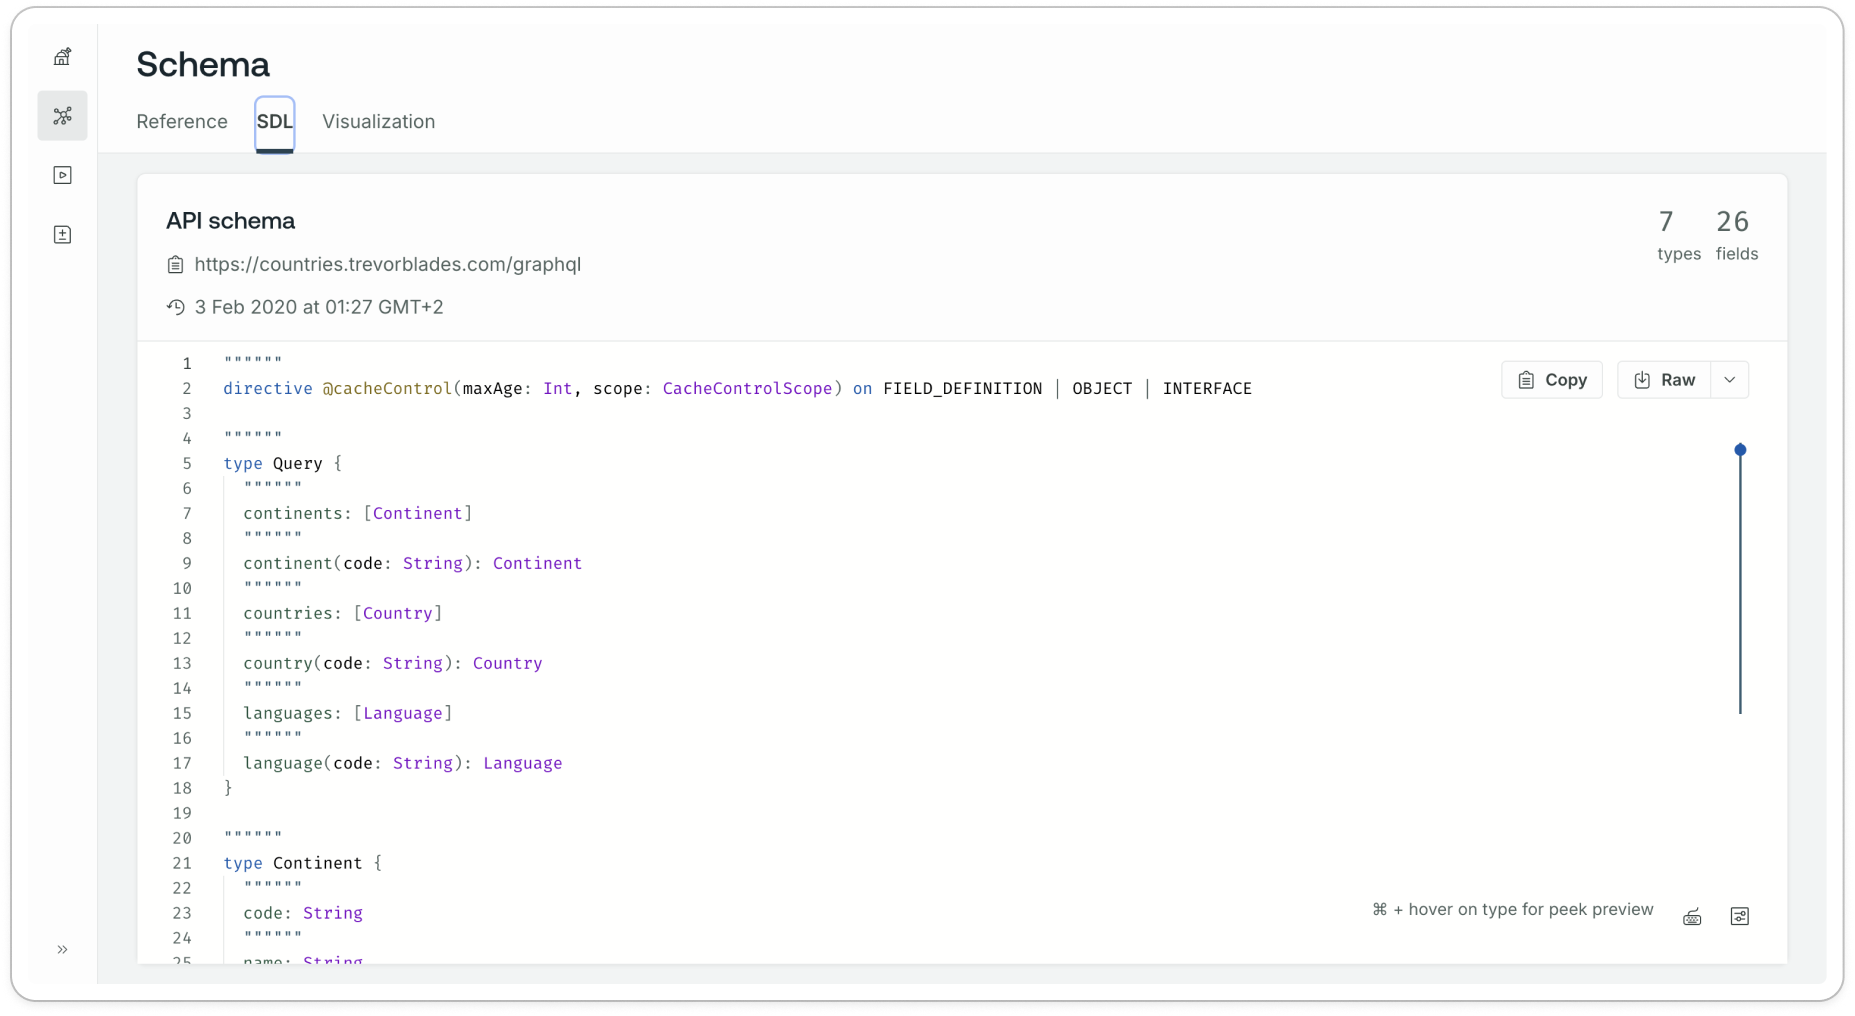
Download the API Schema as a raw file.
Register the GraphQL API in the Toolkit
In the ComUnity Developer Toolkit, navigate to Third Party Services > APIs.
Provide a name and an optional description for your API.
In the Provide Service URL field, enter:
Click the Select file button and upload the schema file downloaded in the previous step.
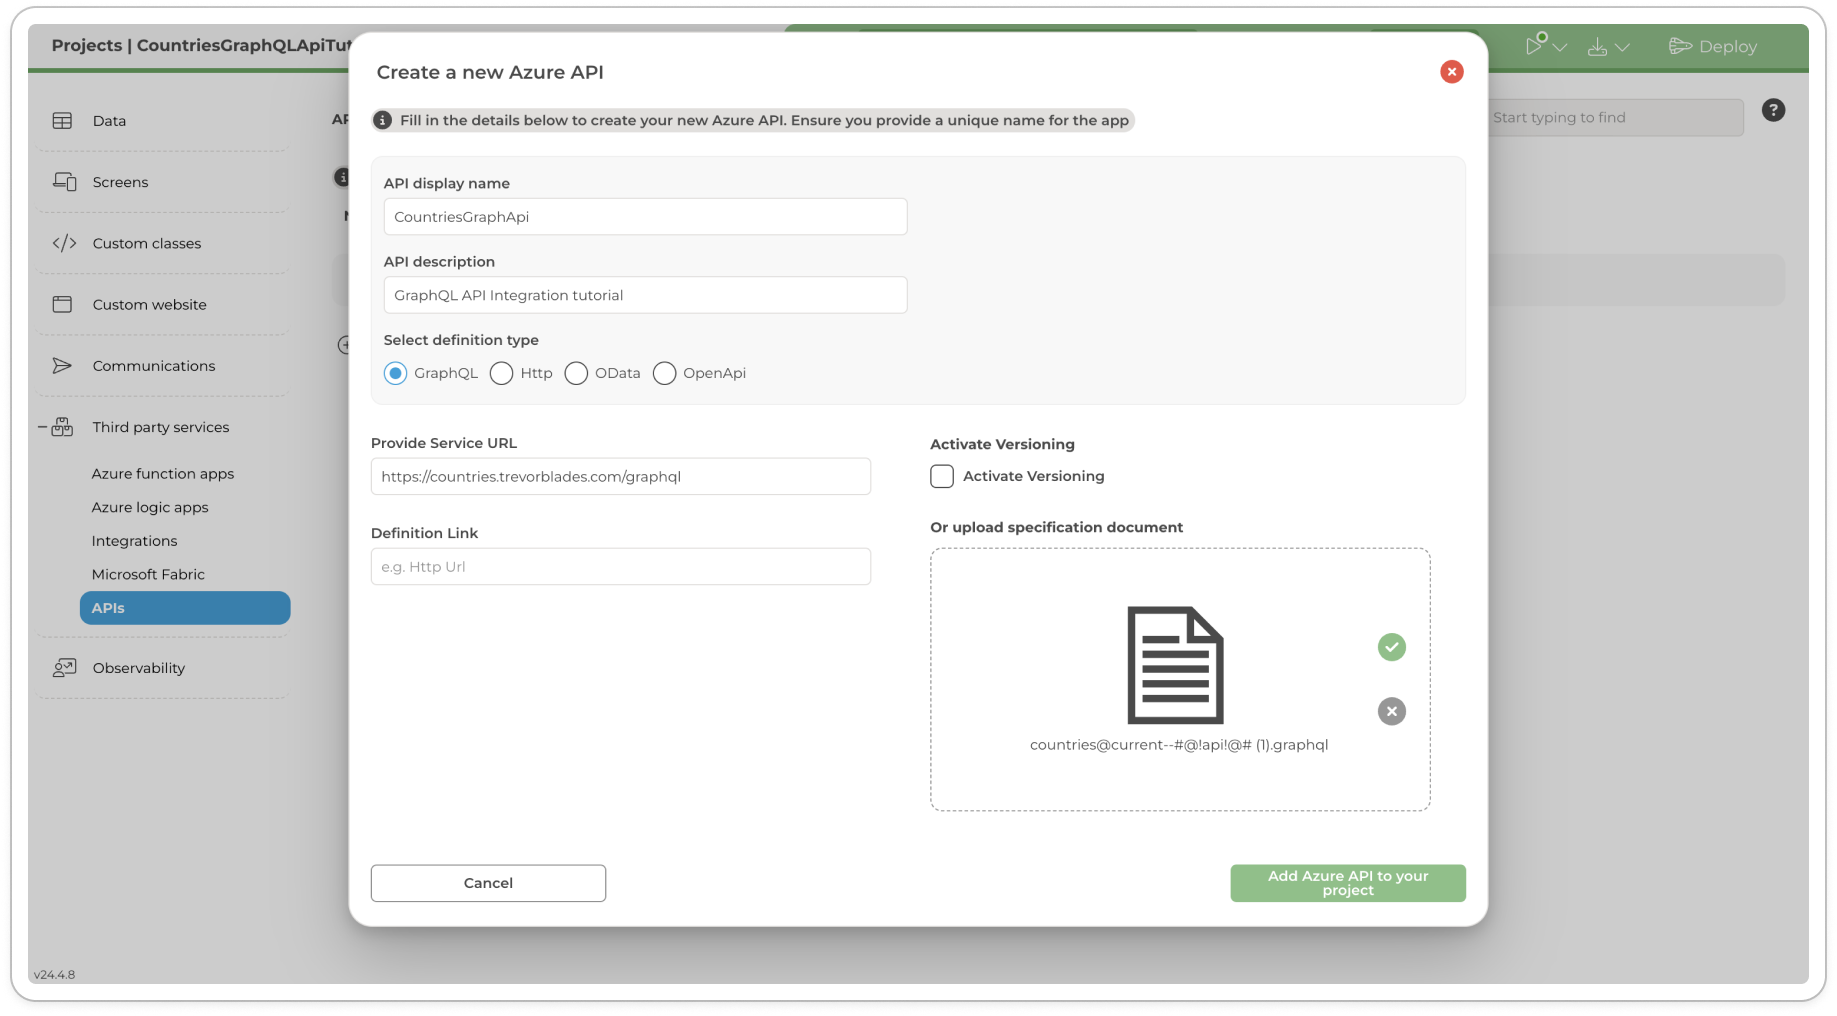
Creating a GraphQL Azure API in the Toolkit Click the Add Azure API to your project button to register and configure the API in Azure API Management (APIM). This process ensures the API is properly registered and available for further integration within the Toolkit.
Verify the API Registration in Azure
After the API is registered, click the ellipsis (⋮) button next to the API in the Toolkit and select View in Azure Portal.
You will be redirected to Azure API Management (APIM).
Locate your newly created API under APIs (use the search function if needed).
Open the Settings tab and check for any schema validation errors to confirm the API was successfully registered.
Test the Countries GraphQL API in Azure
In Azure API Management (APIM), navigate to the Test tab.
Copy and paste the following GraphQL query into the Query Editor:
Click Send to execute the query.
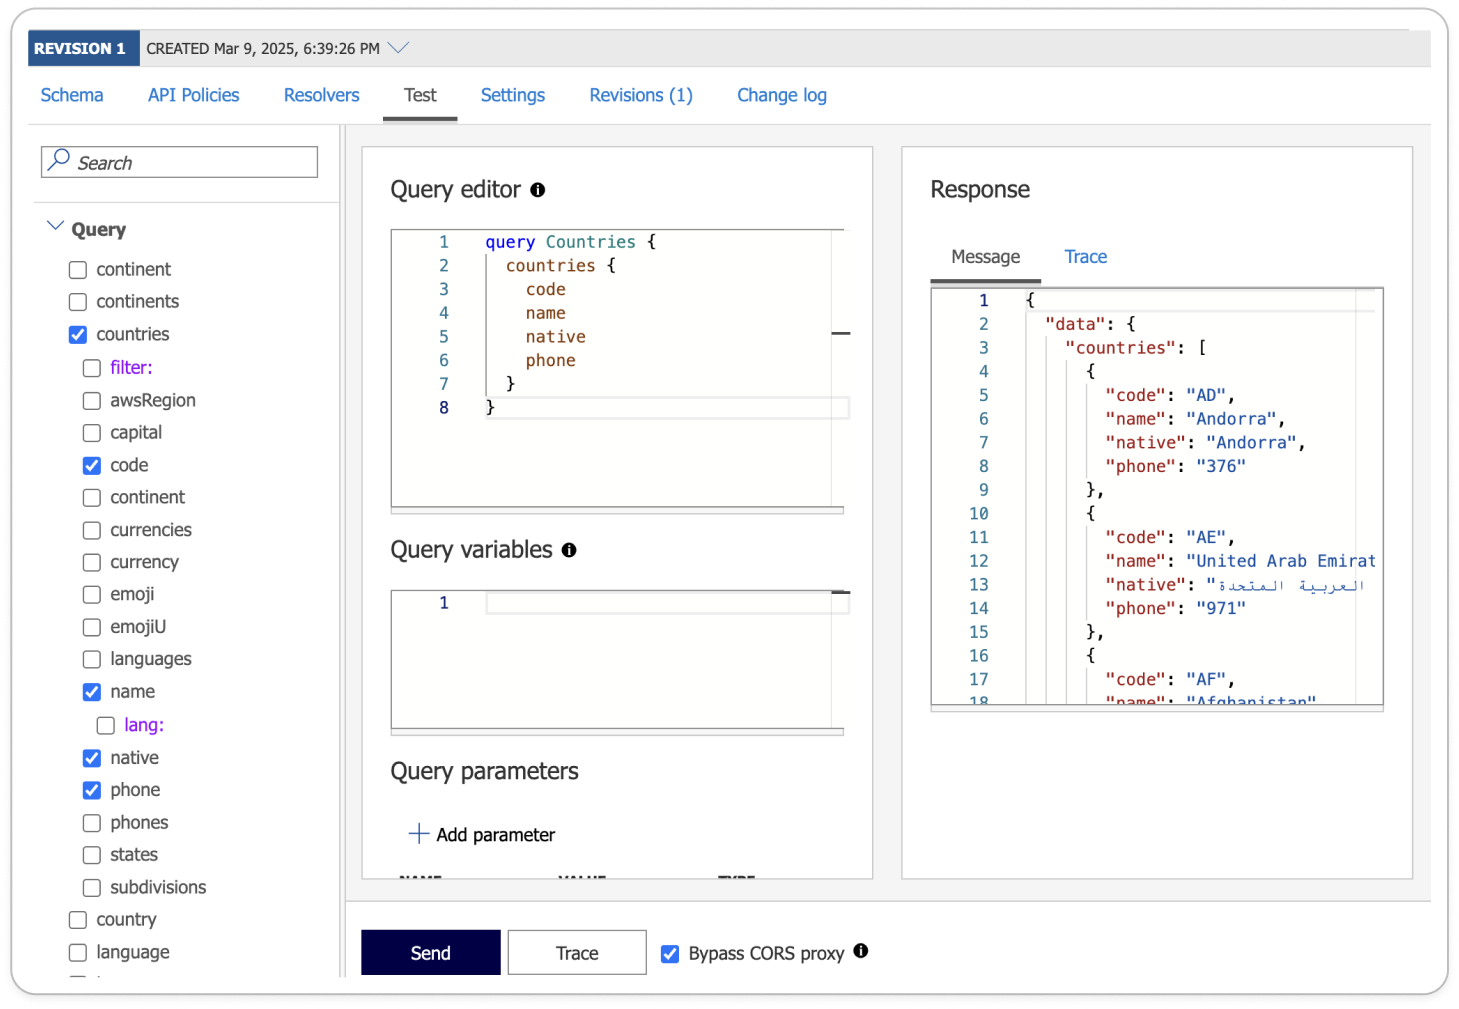
Verify the response data to confirm that the API is correctly retrieving country details. Once confirmed, you can proceed to define a Virtual Entity for structured interaction with the API within the Toolkit.
Configure Properties and Security of the Country Virtual Entity in the Data model: Go back to the ComUnity Developer Toolkit under Data. Create a Virtual Entity named Country. For detailed instructions on creating virtual entities in the Toolkit, refer to the Virtual Entities section, take note to include these properties for the entity.
code → string
name → string
native → string
phone → string
For guidance on configuring table security and surfacing entity data to user roles, refer to:
Expose the Countries API via an Virtual Entities and Custom Classes
Go to Custom Classes in the Toolkit select the WebConfigApi class and register your Virtual Entity as shown below (line 21):
Update the Country entity class as shown below:
Update your controller class as shown below:
GraphQL Integration in the Toolkit
The ComUnity Developer Toolkit only supports OData-compliant endpoints. To integrate a GraphQL API, all interactions — including queries and mutations — must be manually transformed into REST-style HTTP requests within custom controller logic. This involves constructing a POST request with the GraphQL operation embedded as a string payload, sending it to the Azure APIM-hosted endpoint, and parsing the response into a usable format. This approach ensures the Toolkit can treat GraphQL-driven data as if it were native OData, making it compatible with Virtual Entities, UI rendering, and internal query mechanisms.
Build the UI - for more information on how to build lists in Navigation pages refer to the section Dynamic List Rendering in Navigation pages
Navigate Screens in the Toolkit and create a Countries Navigational page.
Set an icon of your choice
Add a List item to your screen
Click the List item to activate it
In the Properties Editor set the fields below with the values shown to set up your screen:
Data Path:
Item Title :
Build and Launch your project and view your countries in your application.
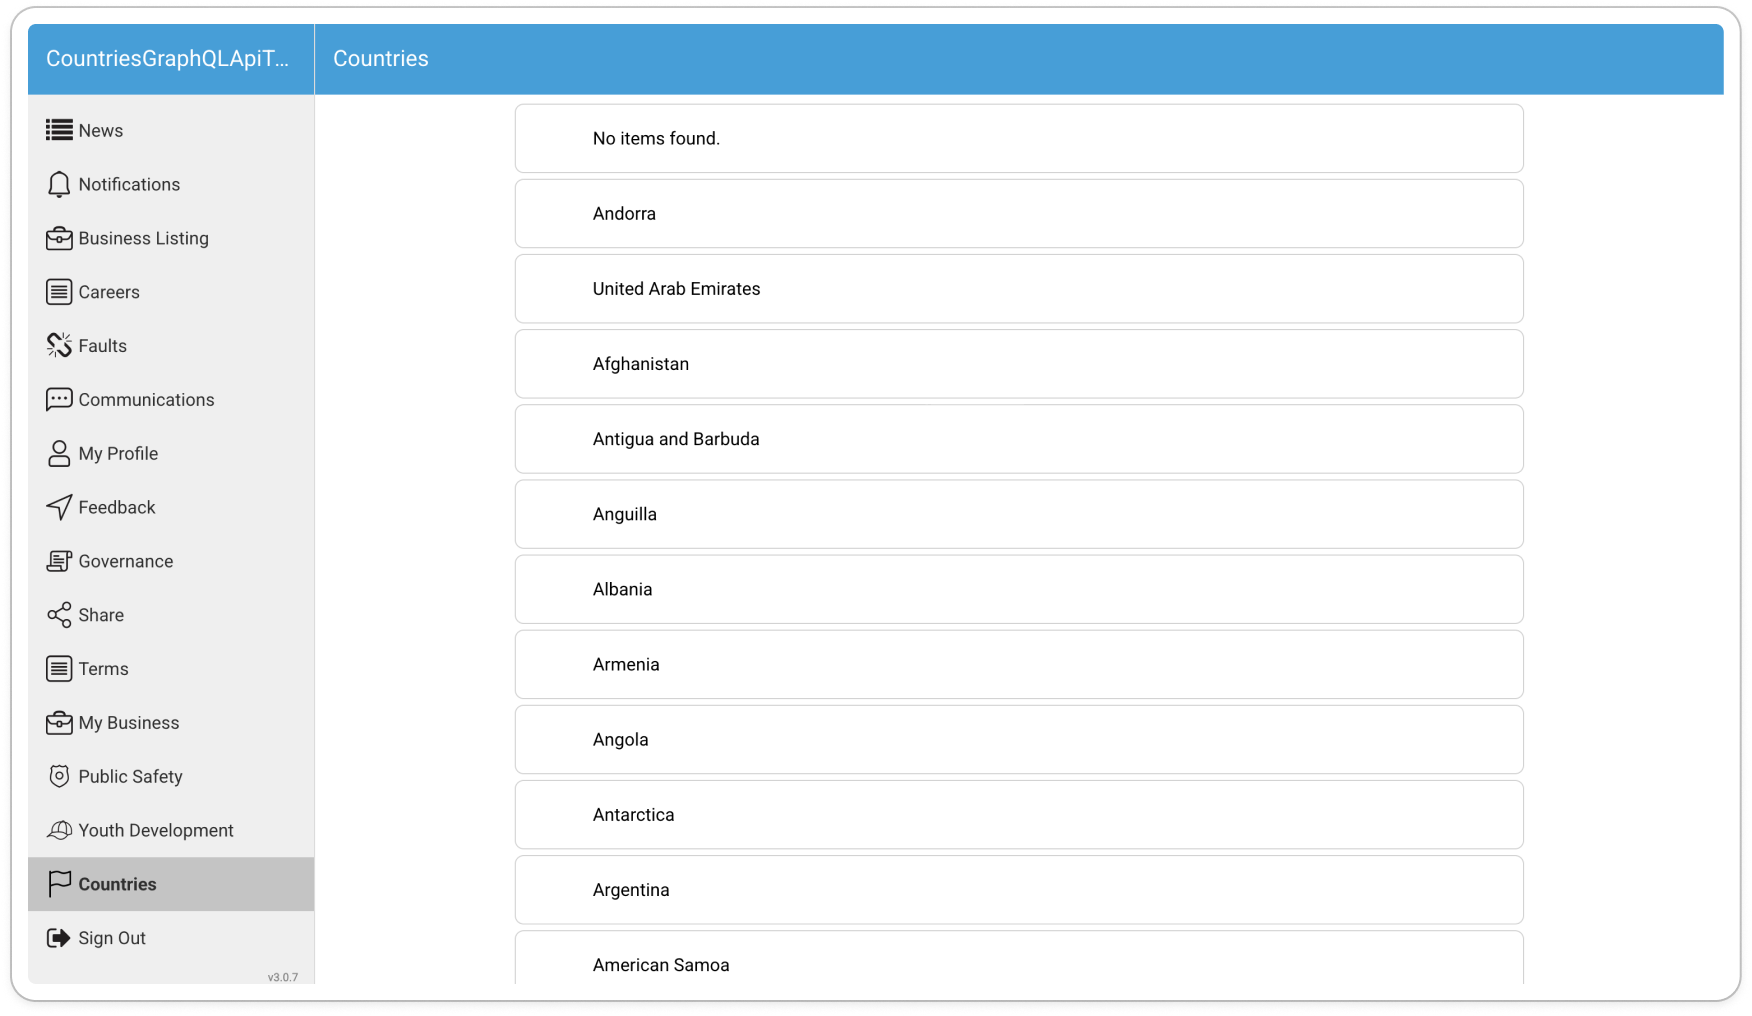
Countries served from the Countries GraphQL API in an app
Conclusion
This tutorial demonstrated how to integrate a GraphQL API into a ComUnity Toolkit application using the APIs feature, powered by Azure API Management. By connecting to the open-source Countries GraphQL API, we illustrated how to register and configure APIs, define Virtual Entities, and transform GraphQL queries into OData-compliant operations using custom classes and controllers.
This approach not only enables controlled data access through the Toolkit but also allows developers to model and expose external data using familiar tools and standards. The flexibility to work with GraphQL—despite the Toolkit’s OData-first design—shows how adaptable the platform is for diverse integration scenarios.
To further extend this implementation:
Try adding GraphQL queries with parameters, such as querying countries by continent or language.
Explore mutation operations and how they can be adapted into REST-style POST requests for OData compatibility.
Improve the UI to display more detailed country data or filter results.
By applying these techniques, you’ll be able to build dynamic, data-rich applications that consume a variety of third-party APIs while maintaining a well-structured data model and user experience within the ComUnity Platform.