ComUnity Platform
25.x
25.x
  • ComUnity Technical Overview
  • Getting Started
    • ComUnity Developer Toolkit
      • Login
      • Manage your account: Profile, Settings, and Actions
    • Manage your project
      • Create a project
      • Project Settings
      • General
      • Build and launch your project
      • Templates
      • App Users & Roles
      • Themes
      • Versions
      • Icon Management
      • Store URLs
      • Deploy
        • Environments
        • Manual Project Deployment Across Environments
        • Configuration
    • Organisations
      • Roles and Permissions
      • Organisational Management
      • Teams
  • Toolkit Guides
    • Data
      • Customising the Data Model
      • Manage Entities in the Data Model: Step-by-Step Guide
      • Setting Up Role-Based Permissions for Entities: Access Control Configuration
      • Creating Entity Associations: Configuring Table Links
      • Manage Inheritance in the Data Model: Configuring Entity Hierarchy and Inheritance
    • Screens
      • Integrated Navigation and UI Builder for Screens in the ComUnity Developer Toolkit
      • Building Screens
        • Screen Controls
        • Navigation
          • Lists in Navigation pages
            • Dynamic List Rendering in Navigation pages
            • Adding Sub-Screens to Navigation pages Using List Navigation
          • Page Link
        • Form
          • Screen Controls
          • Lists in Form pages
            • Static Item - List Item
            • Single Item - List Item
            • Entity Items - List Item
    • Custom Classes
    • Custom Website
      • Bindings
      • Pages
        • Page Development
        • Page Elements
        • Templates
        • Resources
    • Communications
      • Configuring Dynamic Action Templates for Event-Driven Communication Channels
        • Event Details: Understanding Data Sources for Dynamic Template Building
        • Email
        • SMS & WhatsApp
        • INAPP
        • Push Notifications
        • HTTP
      • Triggering the Communication Service
      • Communication Settings
    • Events and Notifications Management
    • Observability
      • Client Analytics
      • Metrics
      • Traces
    • Third Party Services
      • Azure Function Apps
      • Azure Logic Apps
      • Integrations
      • Microsoft Fabric
      • APIs
    • Services
      • Media Server
  • General Information
    • Debugging and editing your application code
  • Toolkit Tutorials
    • Build a Simple Blog App: The Beginner's Guide to ComUnity Development
    • Building a Comprehensive News App: Integrating In-App Messaging, Push Notifications, SMS, and Email
    • APIs
      • JSON Placeholder Todos API Integration in a Simple Blog App
      • Countries GraphQL API Integration Using the APIs feature in the Toolkit
      • Integrating the JSONPlaceholder Posts API Using the Toolkit’s OpenAPI Feature
      • OData Integration with the Bookings API Using the APIs feature
    • How to Configure In-App Notifications for User Profile Updates Using Communications
  • Enhancing Cases App: Real-time Comment Notifications
  • Reference articles
    • Glossary
    • Privacy by Design
    • OData
    • Razor
    • CRUD Functions
    • Mustache Templating
    • Temporal Tables
    • Integrating WhatsApp Business with the ComUnity Platform
    • Data Types
    • Field Types
    • Table Links
    • Release Notes
    • Keyboard Shortcuts
Powered by GitBook
On this page
Export as PDF
  1. Getting Started
  2. Manage your project

Create a project

To create a project using the ComUnity Developer Toolkit, the first step is to log in to the platform. If you're unsure about the login process, you can refer to the Login section for more information.

Once you have successfully logged in, you will be directed to the Home screen. If you are already actively engaged in a project, click on the Home navigation item located within the menu bar.

To create a new project, follow these steps:

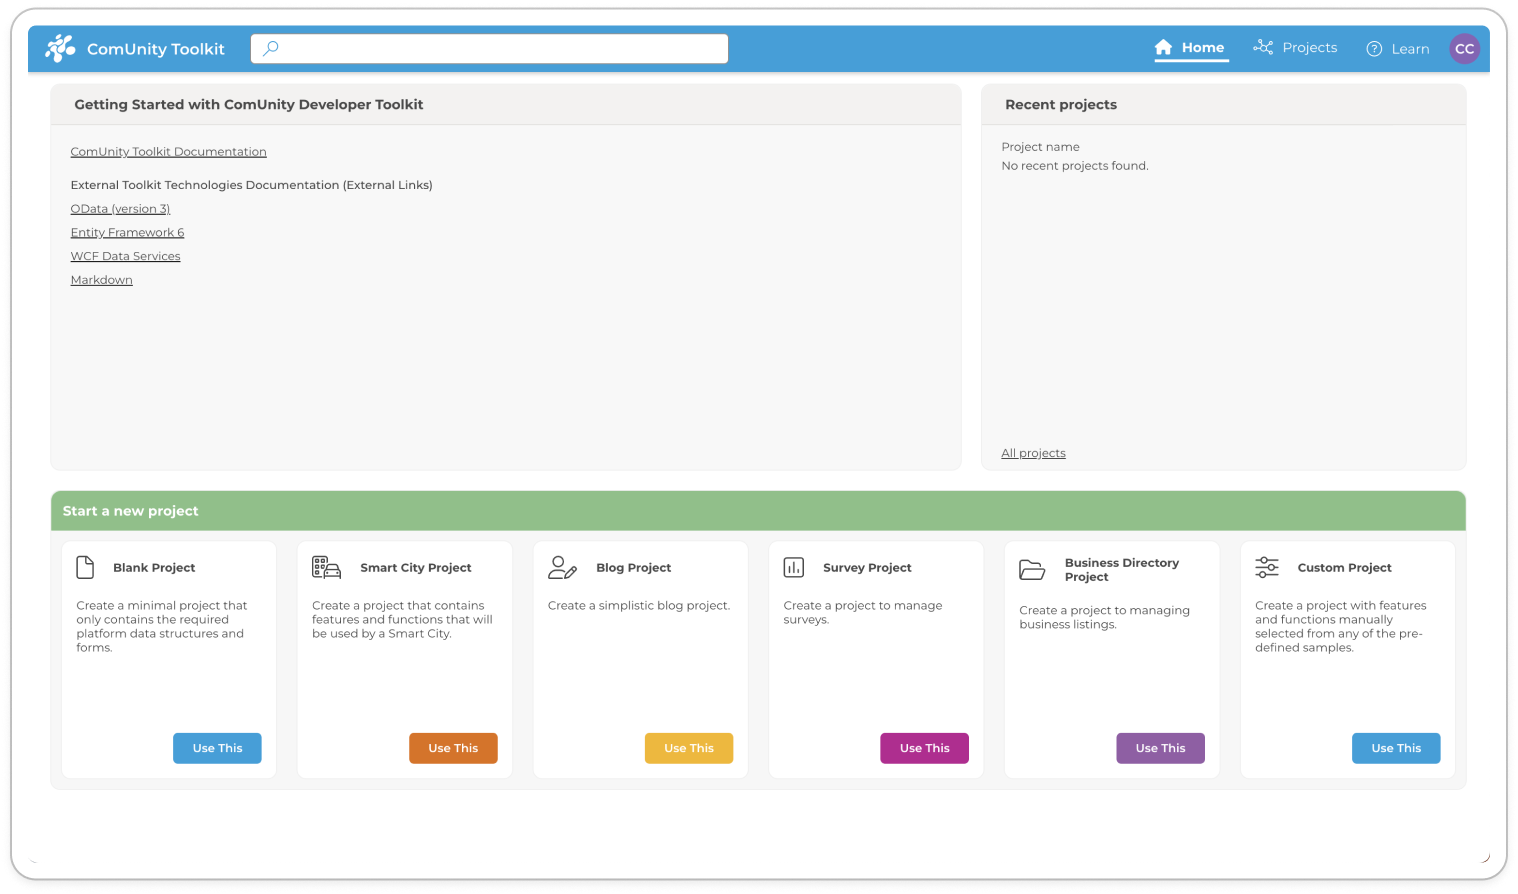
  1. Go to the Start a new project section at the bottom of your home page. Here, you'll find a variety of templates to choose from to help you create your project.

  2. If you're not sure which template to use, you can check out the Samples section to learn more. Alternatively, you can use a blank template, by selecting the Blank Project.

  3. Once you've found a suitable template, click on the Use This button on the template's card. This will open a new dialog box where you can enter your project details.

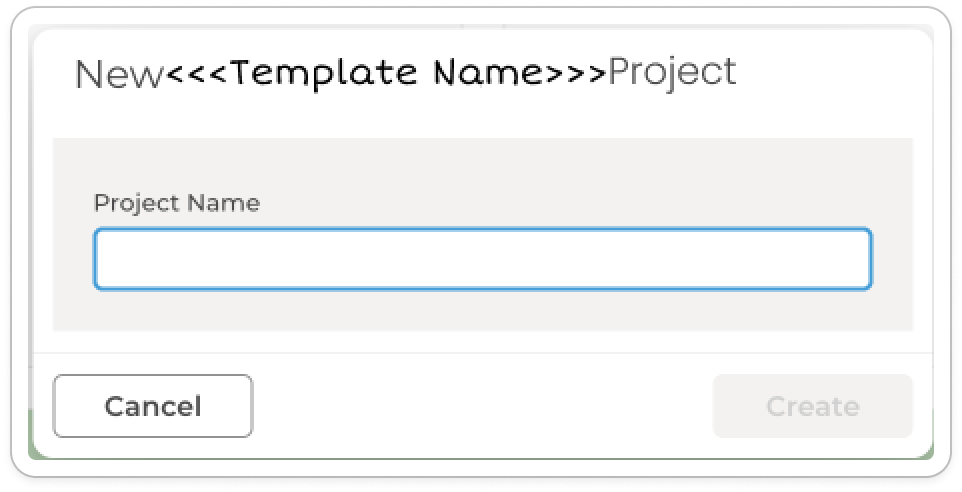
  4. Enter a unique name for your project in the Project name box.

  5. Click on the Create button to create your new project

  6. Once your project is successfully created, click on Settings to access your project's settings.

Congratulations on successfully creating your new project! The next step is to Build and launch your project for the first time so as to publish it on Internet Information Services(ISS). Once you've done that, you can start building your project using the Toolkit Guides.