ComUnity Platform
25.x
25.x
  • ComUnity Technical Overview
  • Getting Started
    • ComUnity Developer Toolkit
      • Login
      • Manage your account: Profile, Settings, and Actions
    • Manage your project
      • Create a project
      • Project Settings
      • General
      • Build and launch your project
      • Templates
      • App Users & Roles
      • Themes
      • Versions
      • Icon Management
      • Store URLs
      • Deploy
        • Environments
        • Manual Project Deployment Across Environments
        • Configuration
    • Organisations
      • Roles and Permissions
      • Organisational Management
      • Teams
  • Toolkit Guides
    • Data
      • Customising the Data Model
      • Manage Entities in the Data Model: Step-by-Step Guide
      • Setting Up Role-Based Permissions for Entities: Access Control Configuration
      • Creating Entity Associations: Configuring Table Links
      • Manage Inheritance in the Data Model: Configuring Entity Hierarchy and Inheritance
    • Screens
      • Integrated Navigation and UI Builder for Screens in the ComUnity Developer Toolkit
      • Building Screens
        • Screen Controls
        • Navigation
          • Lists in Navigation pages
            • Dynamic List Rendering in Navigation pages
            • Adding Sub-Screens to Navigation pages Using List Navigation
          • Page Link
        • Form
          • Screen Controls
          • Lists in Form pages
            • Static Item - List Item
            • Single Item - List Item
            • Entity Items - List Item
    • Custom Classes
    • Custom Website
      • Bindings
      • Pages
        • Page Development
        • Page Elements
        • Templates
        • Resources
    • Communications
      • Configuring Dynamic Action Templates for Event-Driven Communication Channels
        • Event Details: Understanding Data Sources for Dynamic Template Building
        • Email
        • SMS & WhatsApp
        • INAPP
        • Push Notifications
        • HTTP
      • Triggering the Communication Service
      • Communication Settings
    • Events and Notifications Management
    • Observability
      • Client Analytics
      • Metrics
      • Traces
    • Third Party Services
      • Azure Function Apps
      • Azure Logic Apps
      • Integrations
      • Microsoft Fabric
      • APIs
    • Services
      • Media Server
  • General Information
    • Debugging and editing your application code
  • Toolkit Tutorials
    • Build a Simple Blog App: The Beginner's Guide to ComUnity Development
    • Building a Comprehensive News App: Integrating In-App Messaging, Push Notifications, SMS, and Email
    • APIs
      • JSON Placeholder Todos API Integration in a Simple Blog App
      • Countries GraphQL API Integration Using the APIs feature in the Toolkit
      • Integrating the JSONPlaceholder Posts API Using the Toolkit’s OpenAPI Feature
      • OData Integration with the Bookings API Using the APIs feature
    • How to Configure In-App Notifications for User Profile Updates Using Communications
  • Enhancing Cases App: Real-time Comment Notifications
  • Reference articles
    • Glossary
    • Privacy by Design
    • OData
    • Razor
    • CRUD Functions
    • Mustache Templating
    • Temporal Tables
    • Integrating WhatsApp Business with the ComUnity Platform
    • Data Types
    • Field Types
    • Table Links
    • Release Notes
    • Keyboard Shortcuts
Powered by GitBook
On this page
  • Overview
  • Why Use Azure Logic Apps?
  • Integrating Azure Logic Apps into Your Project
  • Manage Logic Apps
  • View Details
  • Refresh Endpoint:
  • Delete Logic App:
  • Additional Resources
Export as PDF
  1. Toolkit Guides
  2. Third Party Services

Azure Logic Apps

Overview

Azure Logic Apps enable you to automate workflows and integrate applications, data, and services across systems. The ComUnity Developer Toolkit simplifies the management of Logic Apps within your projects, providing tools to create, configure, and link Logic Apps seamlessly.

For in-depth details about Azure Logic Apps’ capabilities, visit the official Microsoft documentation.

This feature was introduced in the ComUnity Developer Toolkit v24.3.

Why Use Azure Logic Apps?

Azure Logic Apps are ideal for:

  • Event-Driven Automation: Automatically perform actions (e.g., send an email, trigger a webhook) based on events like database updates or HTTP requests.

  • Scheduled Tasks: Set up workflows that run on specific schedules (e.g., daily reports, periodic data syncing).

  • Seamless Integration: Connect to over 400 Azure and third-party services (e.g., Office 365, Salesforce, APIs).

  • Low-Code Workflows: Build workflows visually using a drag-and-drop designer, minimising the need for extensive programming.

For a complete overview of connectors and use cases, refer to the Logic Apps Overview.

Integrating Azure Logic Apps into Your Project

Azure Logic Apps allow you to automate workflows and integrate services with minimal effort. This guide walks you through the steps to set up Azure Logic Apps in the ComUnity Developer Toolkit, enabling streamlined automation and integration directly within your project.

To setup Azure logic apps in your project follow the instructions below:

  1. Log In: Access the Toolkit by entering your credentials.

  2. Open Your Project: Locate and select your project within the Toolkit.

  3. Access Azure Logic Apps: In the sidebar, expand the Third Party Services section and click on the Azure Logic Apps tab to begin the setup process. A list of existing Logic Apps in your project, if any, will be displayed on this screen.

  4. Click Create an Azure Logic app button, a pop-up window will appear with the heading Create an Azure Logic App. You will see a single input field labeled Azure Logic App Name, enter a unique name for your Logic App in the field (e.g., MyLogicApp).

  5. Once created, the Logic App will appear in the screen with the following details:

    • Azure Name: The name of the Logic App.

    • Endpoint: URL: Use this URL to test and confirm that your Logic App is correctly configured. Copy and paste it into your browser to access the newly created workflow.

    • Azure Resource ID: The unique identifier for the resource in Azure.

    • Azure Resource Group: The resource group where the Logic App resides.

    • Created: The date the Logic App was created.

Manage Logic Apps

The ComUnity Developer Toolkit provides several options for managing your Logic Apps efficiently. From accessing detailed configurations in the Azure Portal to refreshing endpoints or removing unused Logic Apps, these tools give you full control over your workflows. Use the features below to ensure your Logic Apps remain up-to-date and optimised for your project’s needs.
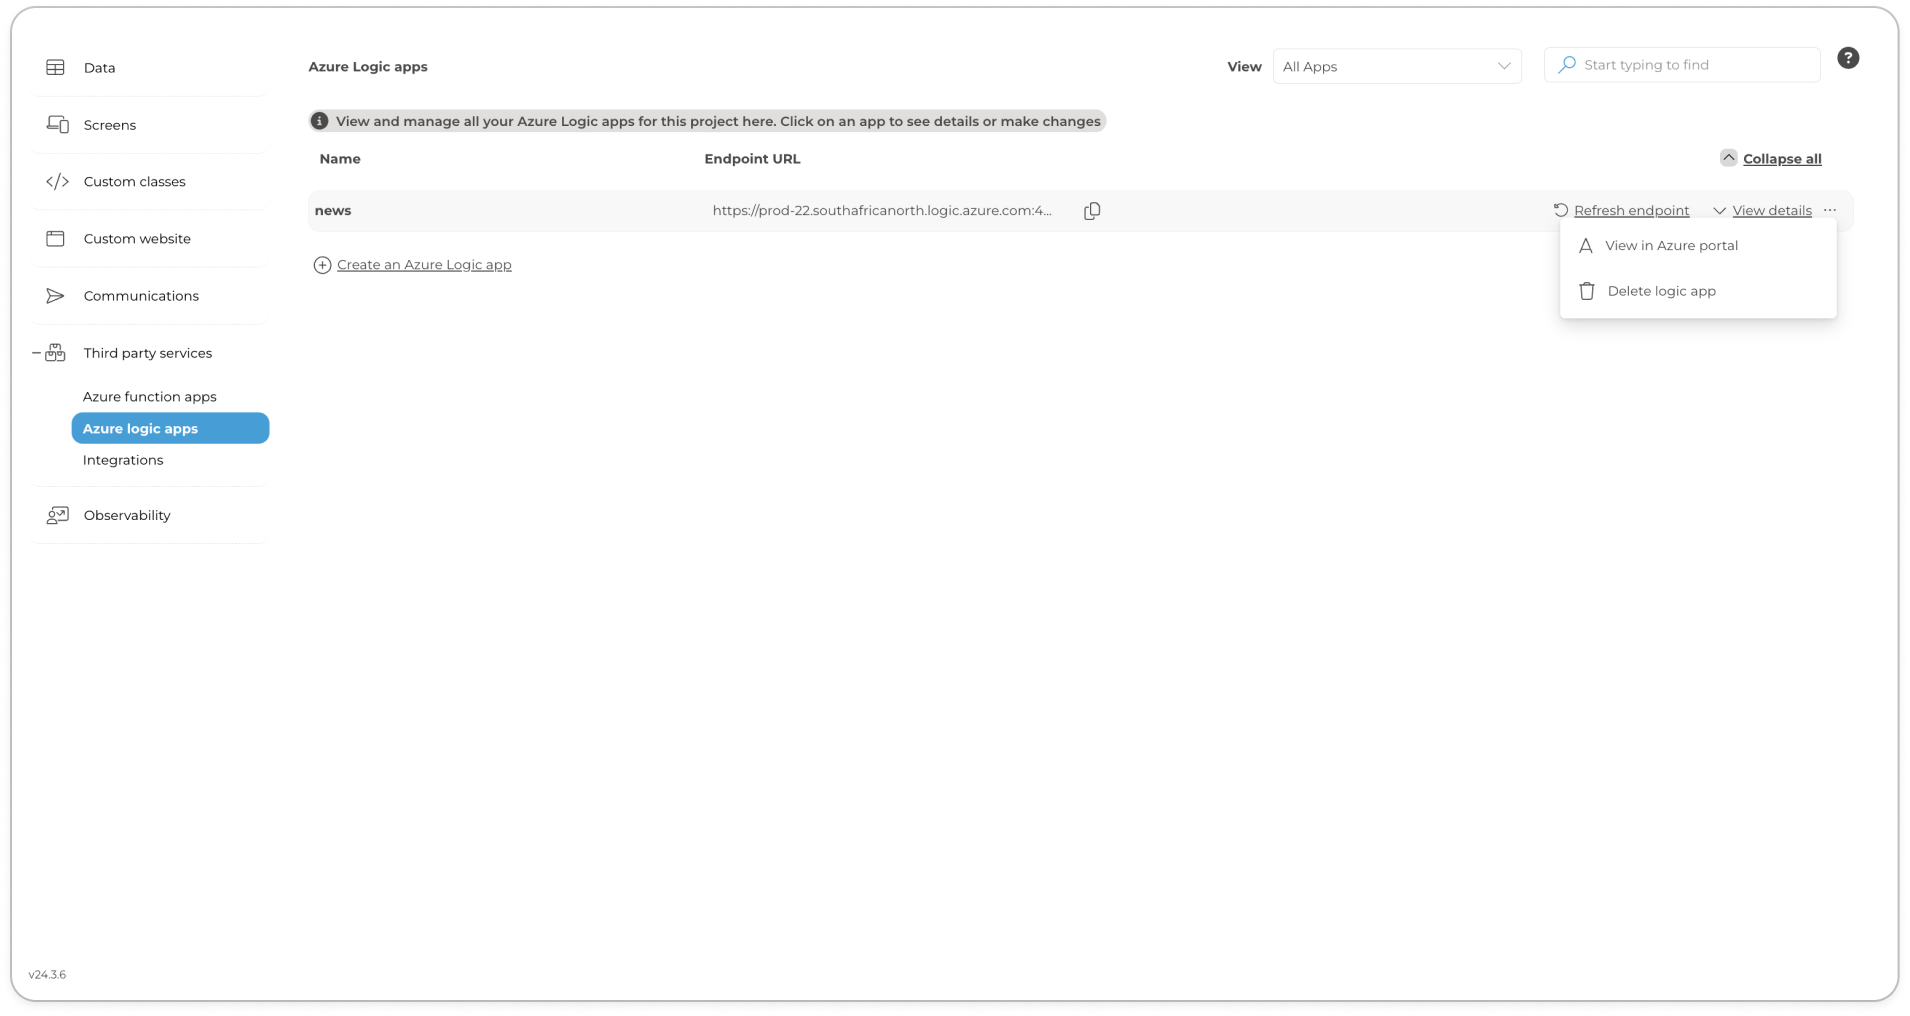
View Details

  1. Select the ellipsis (...) next to the Logic App and click View in Azure Portal.

  2. This redirects you to the Azure Portal where you can edit the workflow, add triggers, and configure actions.

  3. Ensure you have sufficient permissions (e.g., Logic App Contributor) to access and manage resources in Azure. If you encounter a “No Access” error, contact your Azure administrator.

Refresh Endpoint:

  • If your Logic App has a trigger with a URL (e.g., HTTP trigger), click Refresh Endpoint to fetch and display the latest endpoint URL in the toolkit.

Delete Logic App:

• Use the ellipsis menu to delete an existing Logic App if it’s no longer required.

Additional Resources

  • Azure Logic Apps Documentation

  • Connectors Overview

  • Error Handling in Logic Apps

Create an Azure Logic app
Manage Azure logic apps