Manual Project Deployment Across Environments
The deployment process within the ComUnity Platform is a critical pathway that ensures your application is thoroughly tested and stable before it reaches the end-user. Adhering to a structured and sequential progression through the Development, QA/Testing, and Production environments, each stage serves as a gatekeeper, ensuring only the highest quality code is promoted.
Deployment Types: Partial vs. Full Deployment
When deploying your project within the ComUnity Platform, it is essential to determine whether a partial or full deployment is necessary. Each type of deployment serves different purposes and is used under specific conditions.
Full Deployment
A full deployment involves deploying all components of your application. This includes the Data Service, Authorisation Service, Client, Communication service, Configuration, Screens, and any other modules or services within the application. Full deployments ensure that all parts of the application are updated and synchronised.
Use cases for Full Deployment:
Initial release of the application.
Major updates or changes that impact multiple modules or components.
Structural changes to the application that require all components to be redeployed.
Components in a Full Deployment:
Data Service
Authorisation Service
Client
Communication Service
Configuration
Screens
All other application modules and services
Partial Deployment
A partial deployment involves deploying only specific parts of the application. This type of deployment is useful when minor updates or bug fixes need to be applied without redeploying the entire application. Partial deployments save time and resources by targeting only the affected components.
Use cases for Partial Deployment:
Minor bug fixes or updates that affect only a specific module.
Incremental updates that do not require a full application redeployment.
Changes to configuration files or settings that do not impact the overall application structure.
Examples of Partial Deployments:
Authorisation Service: Deploy updates or fixes to the authorisation without affecting other parts of the application.
Client: Coming soon..
Communication Service: Update communication configurations or client modules independently.
Configuration: Modify and deploy changes to specific configuration
Screens: Modify and deploy changes to specific screens or UI components.
Determining the Deployment Type
During the deployment process, the ComUnity Platform allows you to select the deployment type based on your needs. For a full deployment, activate the Full Deployment toggle and ensure all components are selected. For a partial deployment, deactivate the Full Deployment toggle and select only the necessary components.
The decision between partial and full deployment should be based on the scope and impact of the changes being made. By selecting the appropriate deployment type, you can ensure a smooth and efficient deployment process, minimizing downtime and maximizing application stability.
Prerequisites for Deployment
Successful Build: Before initiating deployment, confirm that your project has successfully built without any errors or critical warnings.
Prepare the Project Archive for Deployment
To prepare your project archive for deployment, follow these carefully outlined steps to ensure your application is packaged correctly and ready for the deployment process.
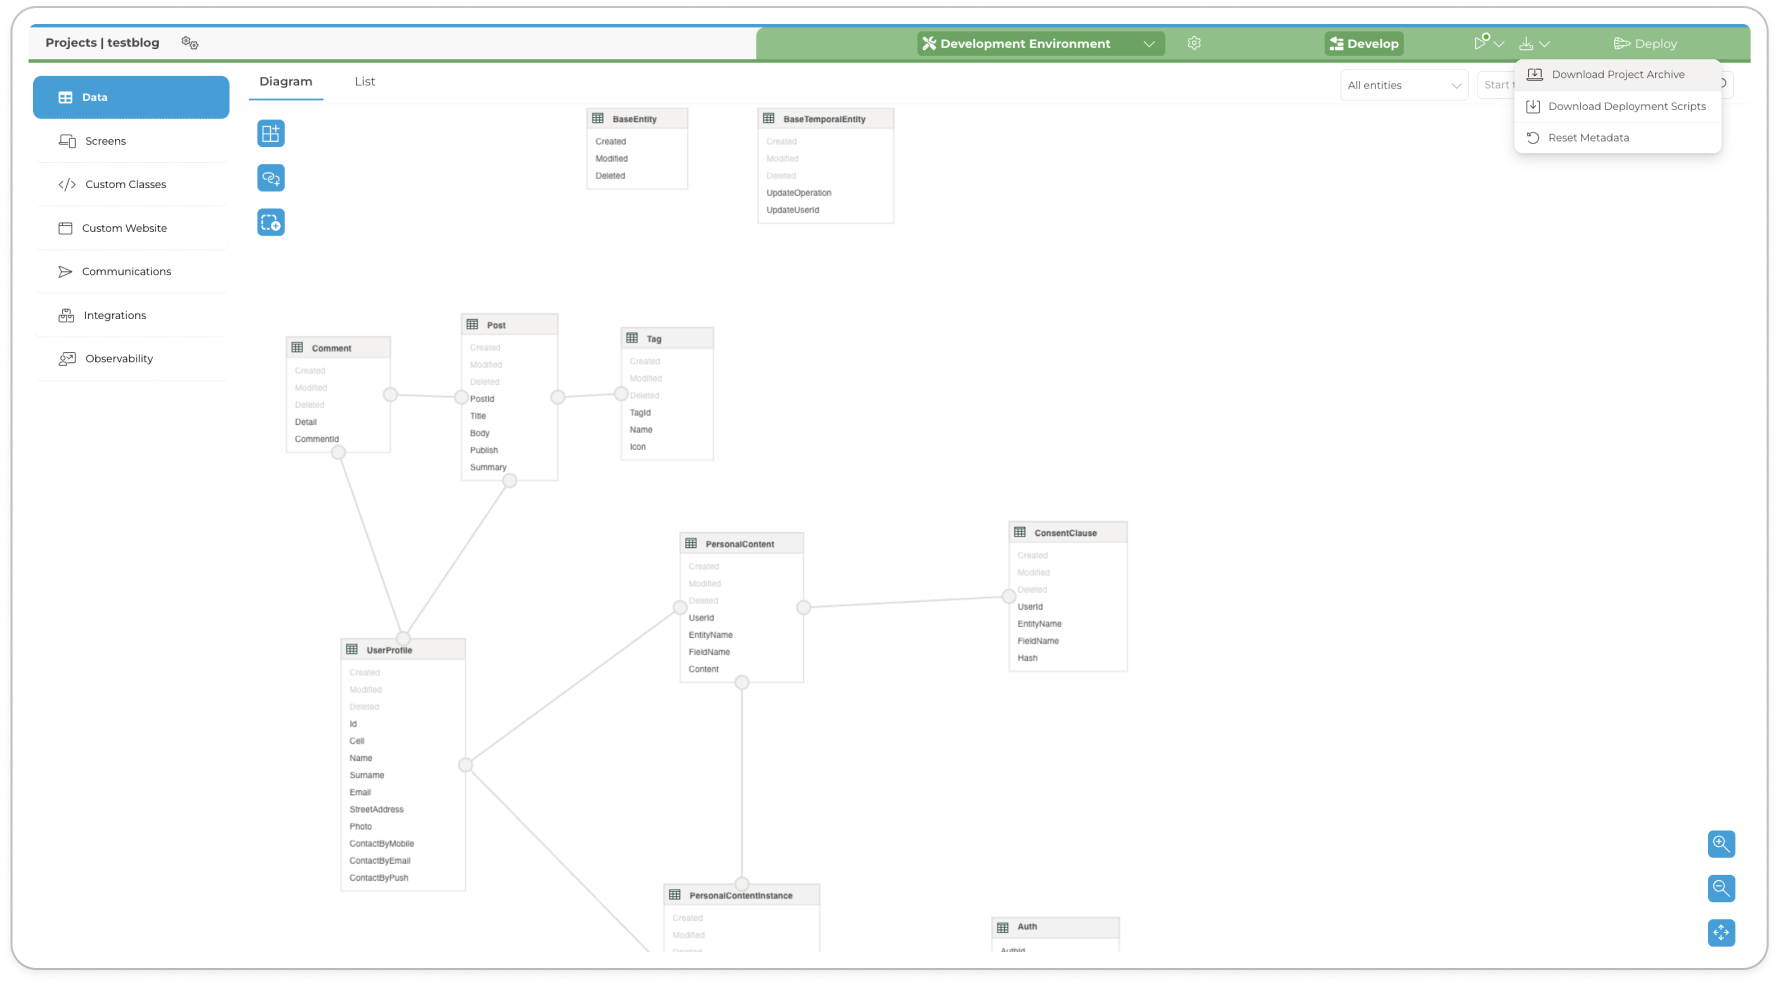
Download the Project Archive:
Obtain the latest version of your project archive. This will include all the necessary files for deployment.\
Open the Web.config File:
Use Visual Studio to access your project's
Web.configfile, which contains critical configurations for deployment which need to be adjusted for the deployment.
Update Configuration Settings:
Within the
Web.configfile, remove keys 13-19 under<appSettings>that are pertinent only to local development.Modify the
ConfigDeploymentkey to reflect the deployment environment, for example:value="<app_name>_qa"for QA deployments andvalue="<app_name>_prod"for Production deployments. The updated section should resemble the following:Go to Project Settings > General and then locate Application Name to view your
<app_name>. Refer to the General section for more details.It is crucial to adhere to the naming convention for the ConfigDeployment key to accurately reflect the deployment environment (e.g.,
<app_name>_qafor QA and<app_name>_prodfor Production) to otherwise failure to do so will result in deployment errors
4. Save and Build:
Save the changes made in the `Web.config` file. *
Build your project within Visual Studio to confirm that there are no compilation errors or issues with your code.
Create a Web Deployment Package: Construct a Web Deployment Package using the Publish Web Wizard in Visual Studio. Refer to the guide Create a Web Deployment Package in Visual Studio for detailed steps.
6. Compress the Package: Compress the deployment package into a .zip file format, readying it for the deployment process.
By the end of these steps, you should have a properly configured and compressed project archive that is ready to be deployed to the designated environment.
Deploy Your Web Deployment Package: A Step-by-Step Guide
To initiate the deployment of a project within the Toolkit, a structured and guided step-by-step process is employed. This methodical approach encompasses the uploading of necessary assets and the precise configuration of deployment scripts. The focal point of this process is the deployment of a web deploy package to an Internet Information Services (IIS) server, which ensures that the application is correctly installed and configured for use in the specified environment.
To successfully deploy a project, follow these steps:
Note: To progress through each step, ensure all required fields and assets are properly set, then click the "Next" button to proceed.
Set Deployment Name and Release Notes: Begin by naming your deployment and providing detailed release notes that outline the changes and features included in this deployment. \
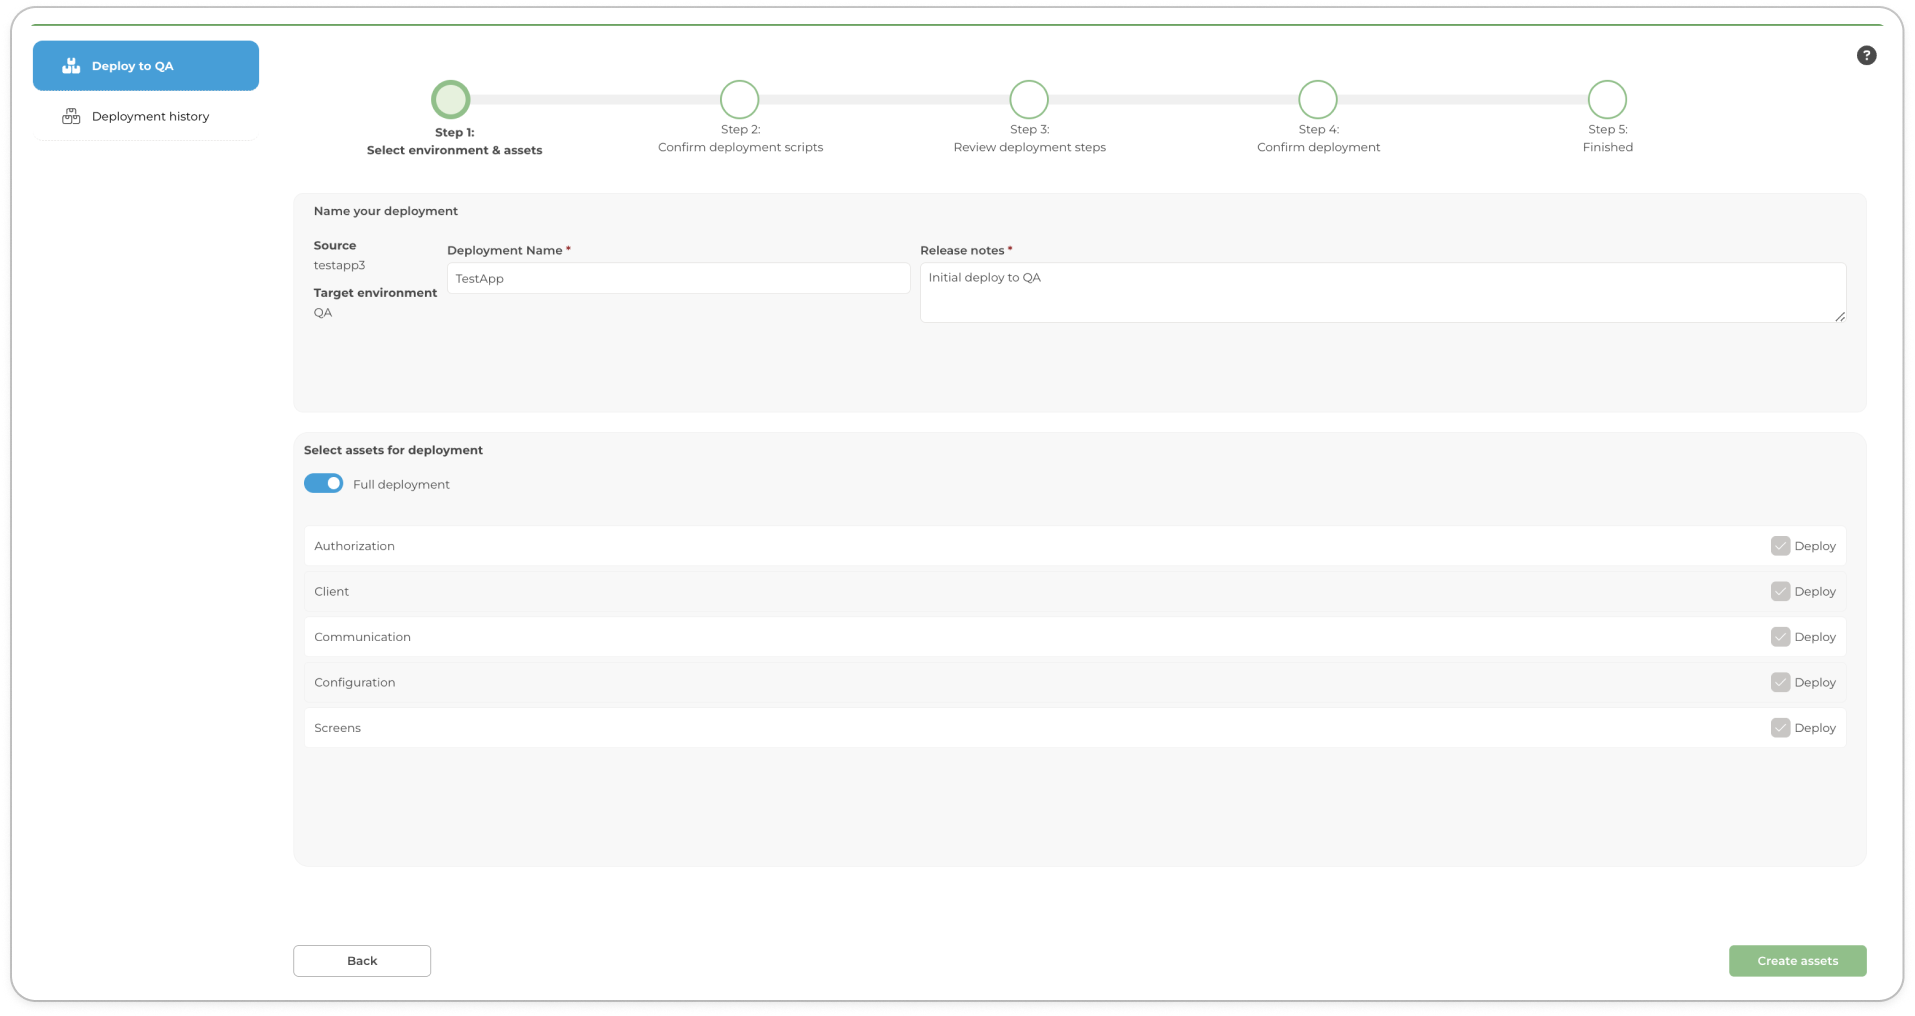
Click the "Create assets" button to proceed with a full deployment
To perform a Partial Deployment:
Deactivate the Full Deployment Switch: Ensure the Full Deployment toggle is deactivated.
Select Relevant Components: Choose only the necessary components (e.g., Authorization, Communication, Configuration) to deploy.
Create Assets: Click the "Create assets" button to proceed.
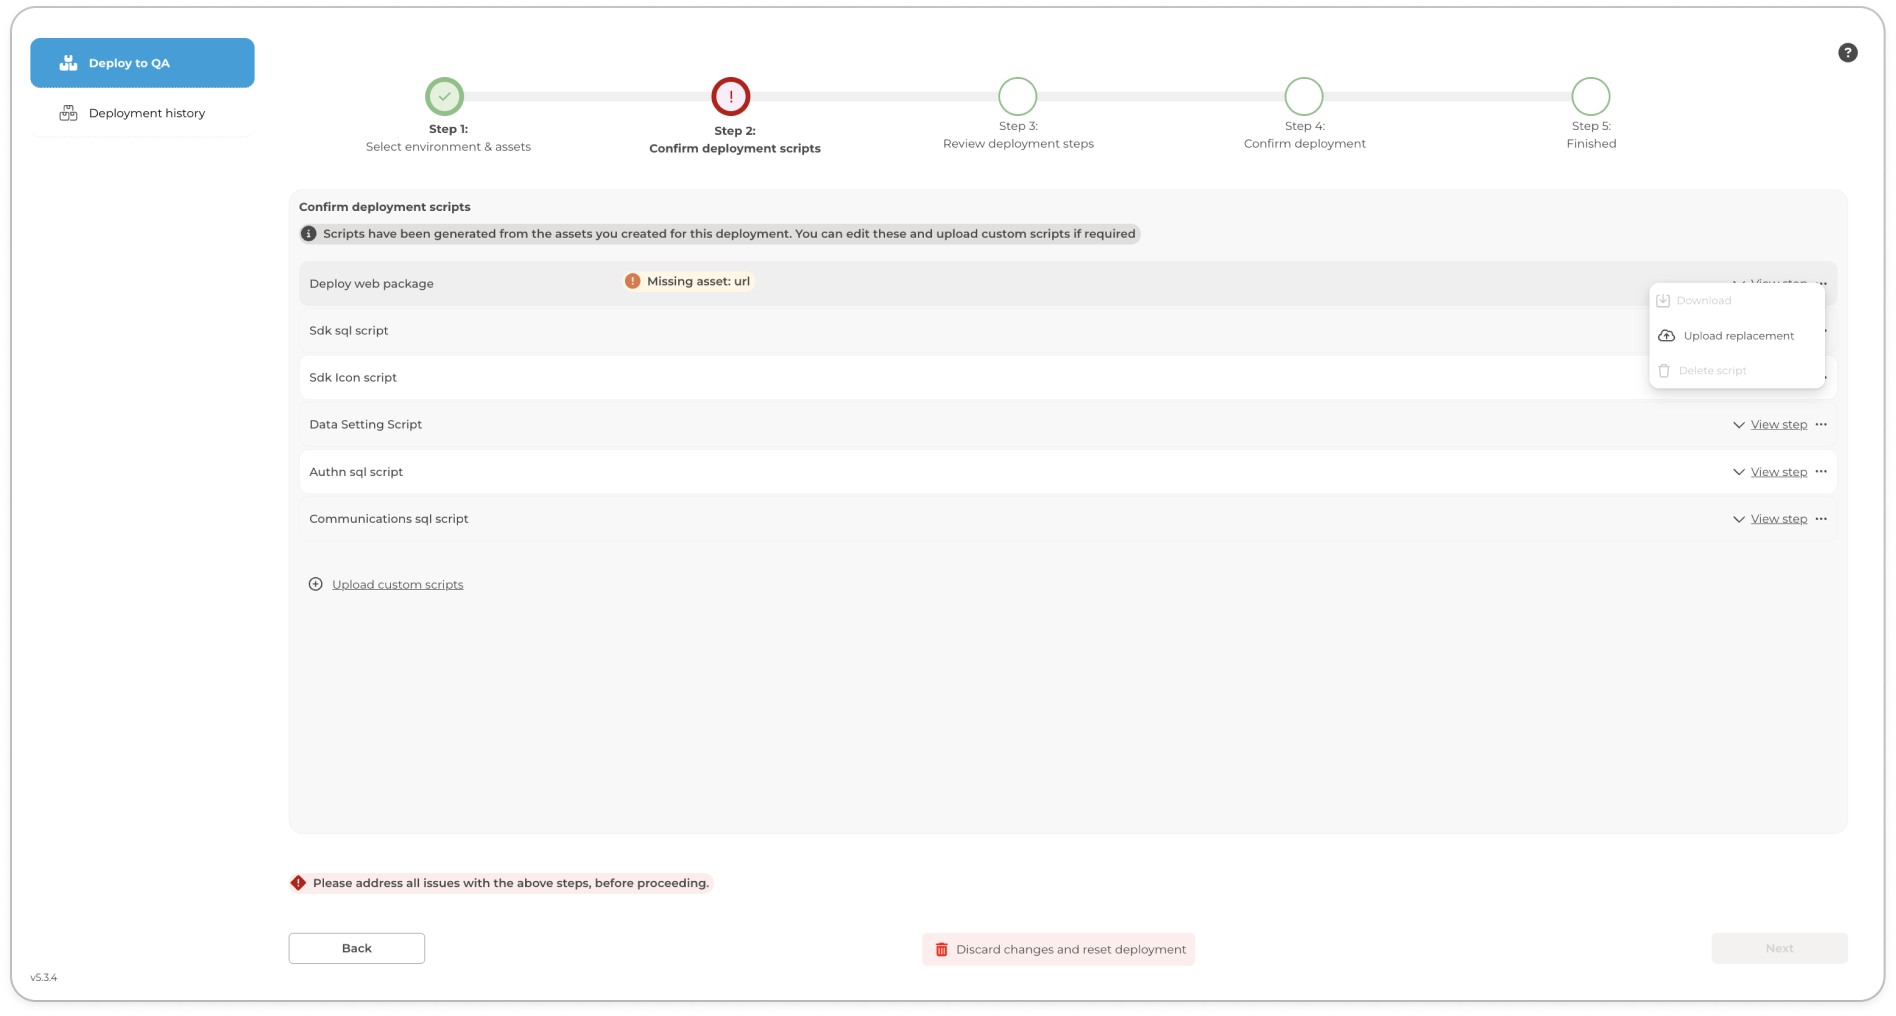
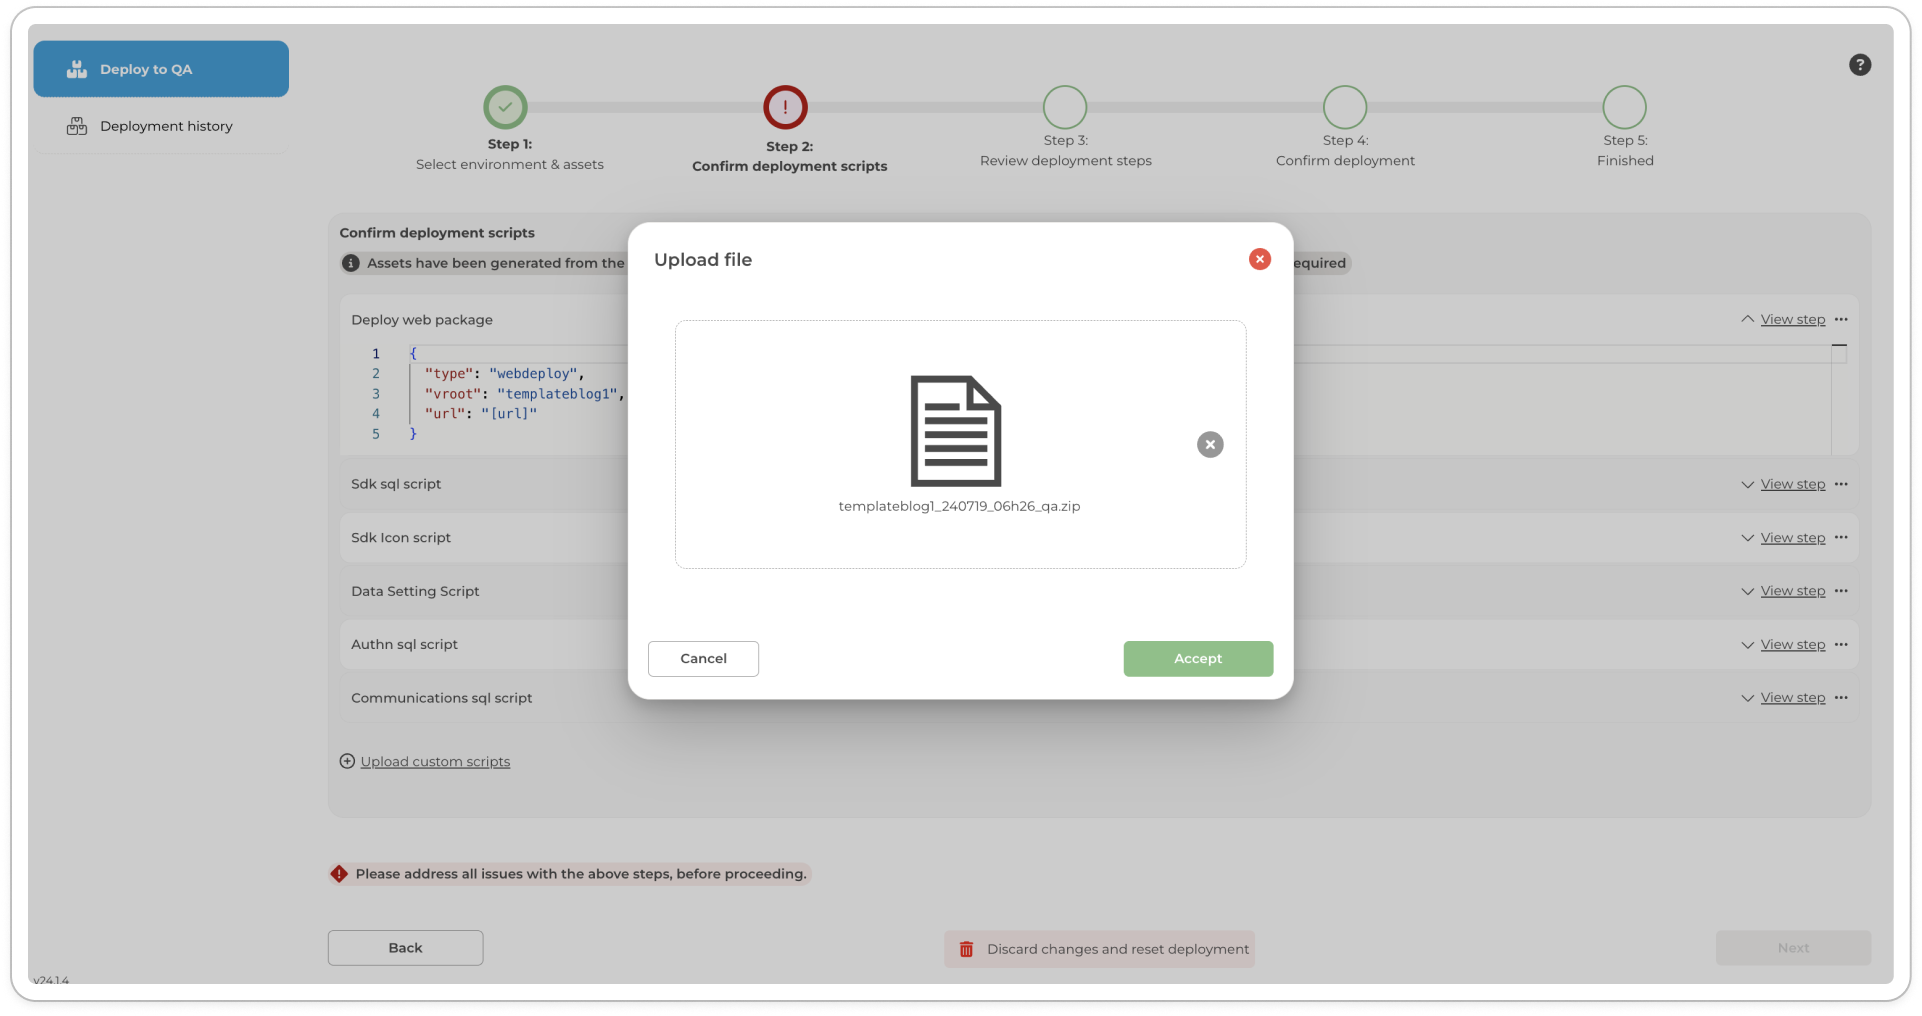
Upload and Configure the Prepared Web Deploy Package: Upload the web deploy package prepared according to the prerequisites. To upload the package, click the three-dot button to open a modal and select "Upload replacement". After uploading, click the "Accept" button and the Toolkit will automatically generate deployment scripts for you. Use the chevron button to expand and collapse your scripts.\
Review Your Configuration Scripts: Thoroughly review the configuration scripts to ensure they are correct and will execute as expected without errors. Make any necessary adjustments. \
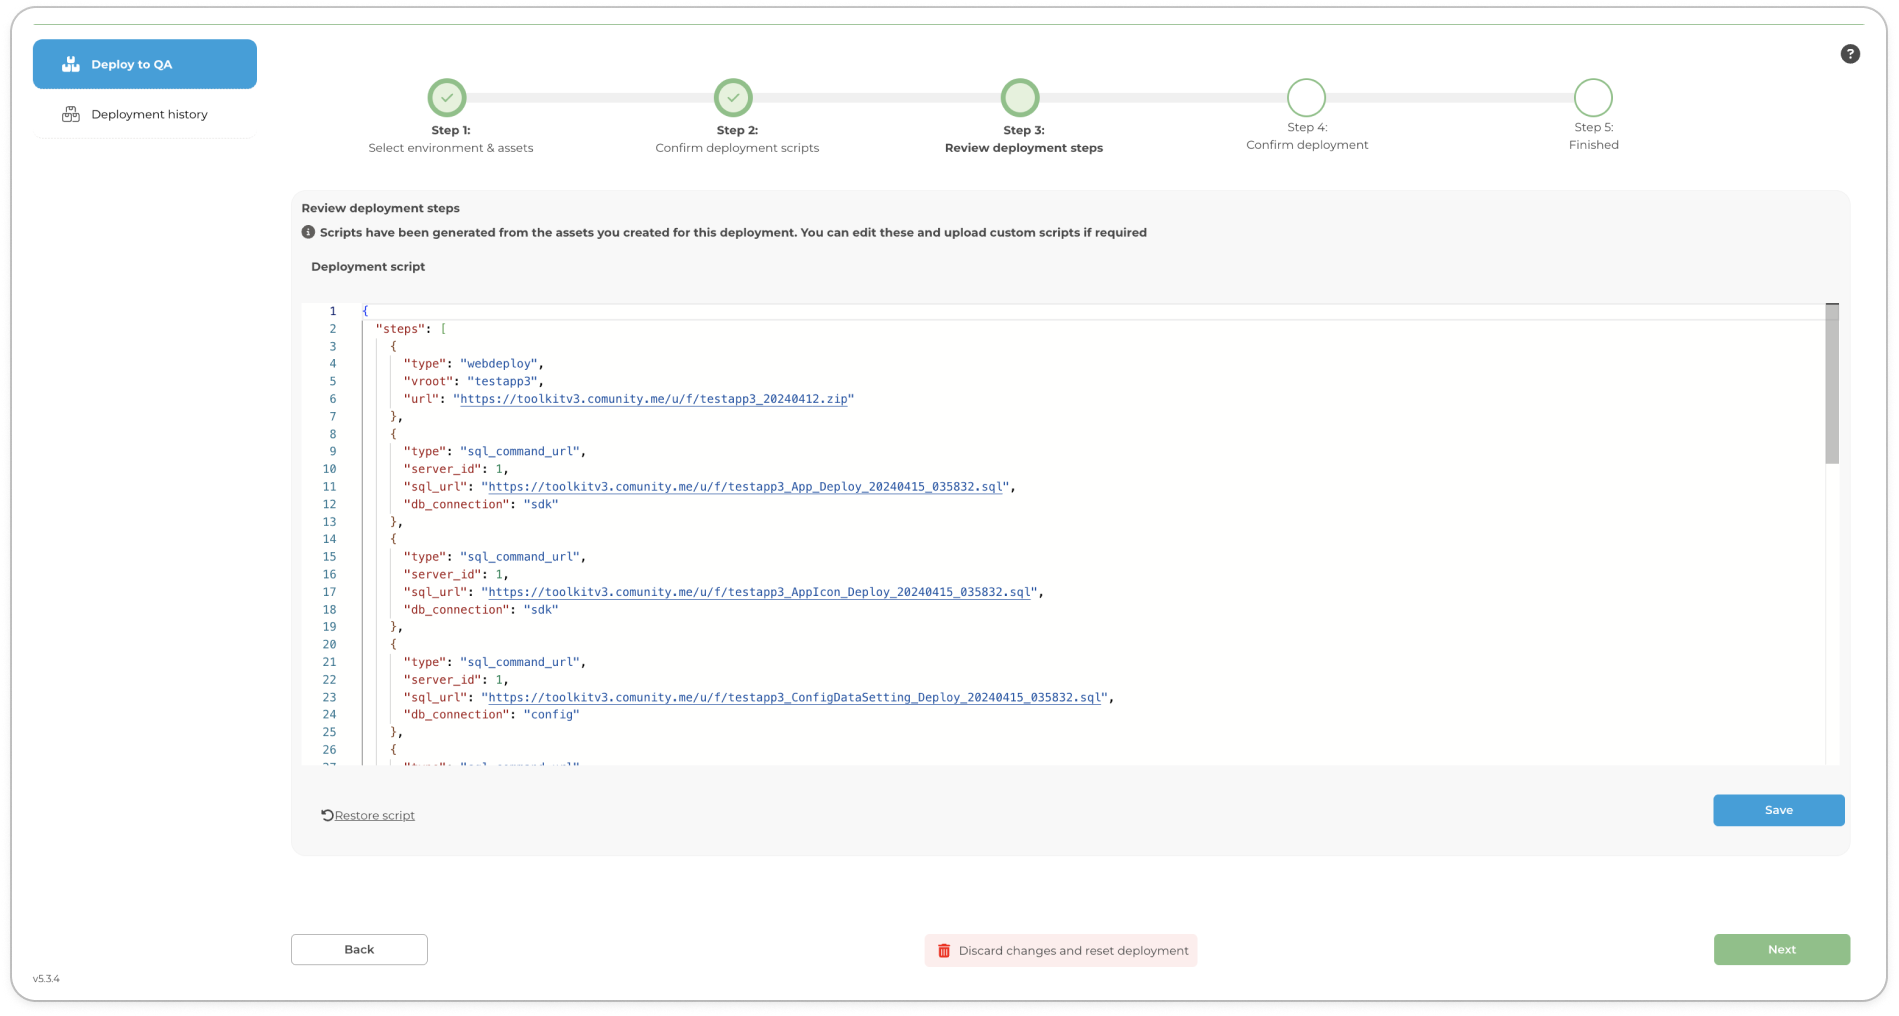
Deploy: With all configurations and reviews complete, proceed to deploy your project. This final step may take some time, so please be patient.\
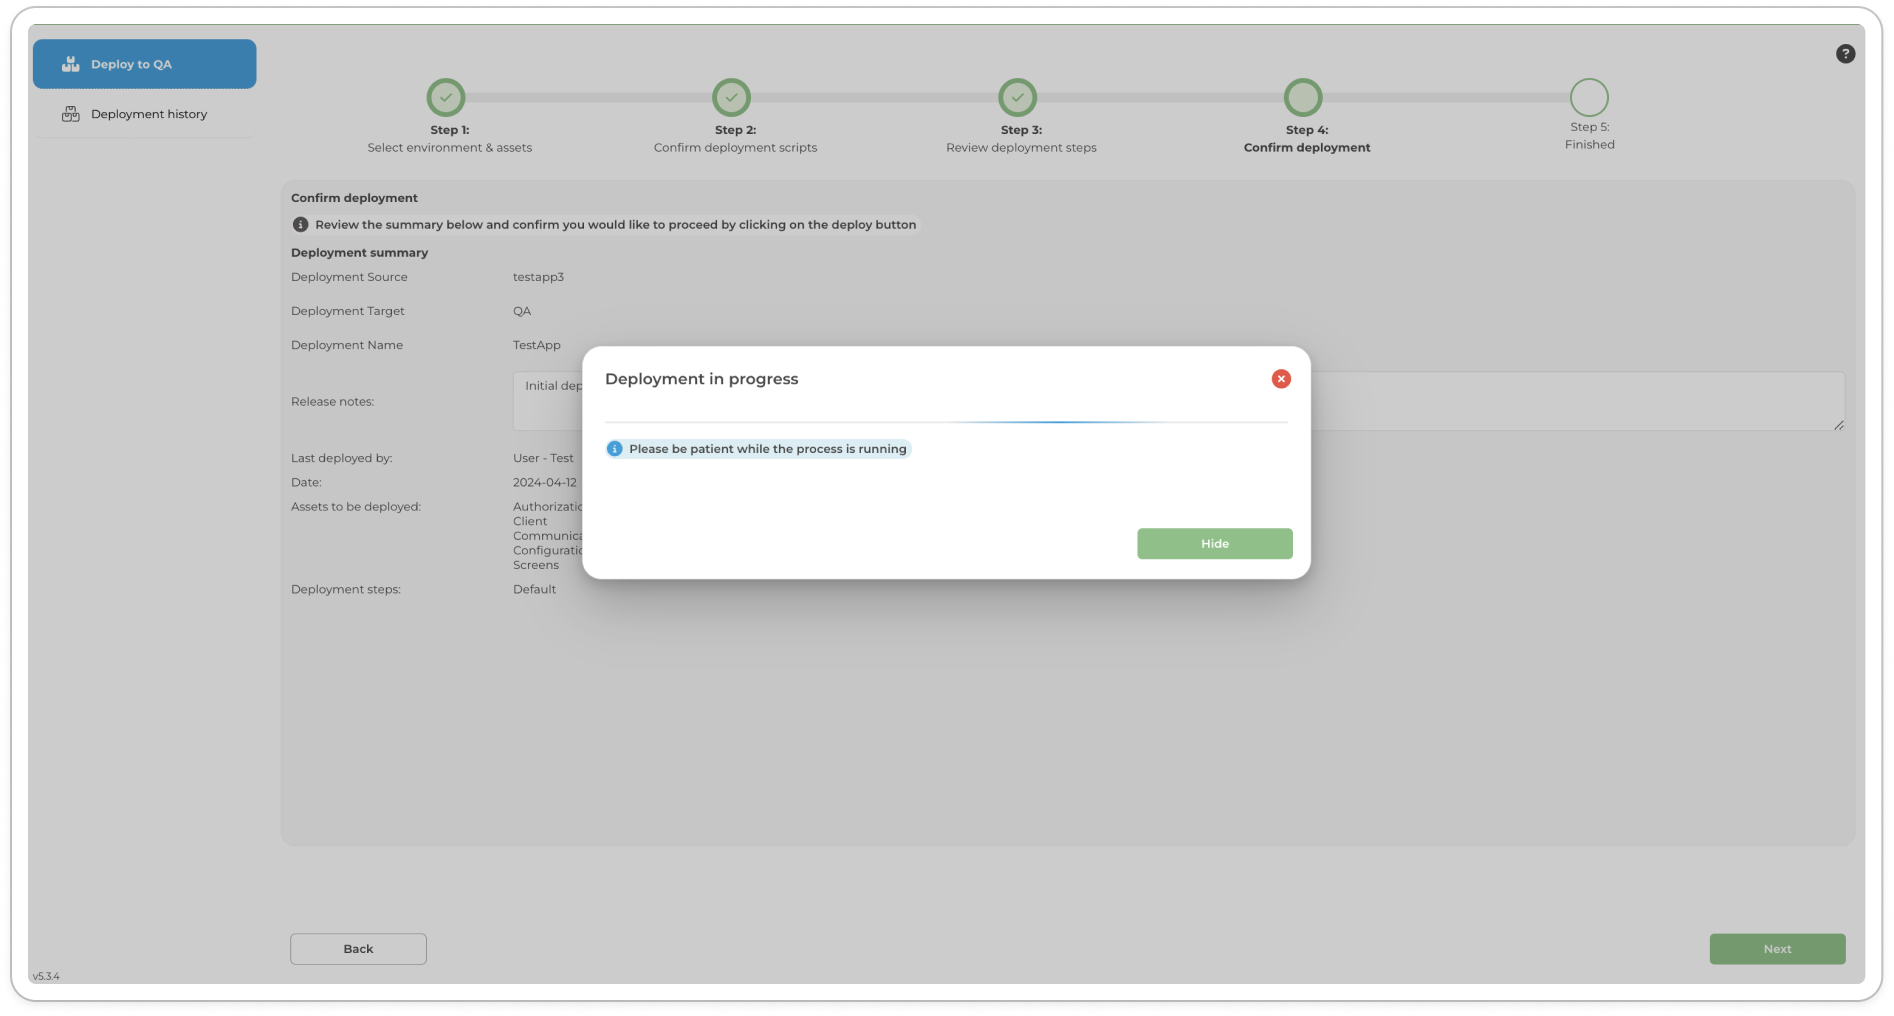
In conclusion, following this structured and detailed guide ensures that your project is deployed smoothly and effectively. By methodically setting up, reviewing, and executing each step, you minimise the risk of deployment errors and ensure your application performs optimally in its intended environment. This careful attention to the deployment process not only smooths the transition between environments but also supports the ongoing development and scalability of your application.
Last updated