ComUnity Platform
25.x
25.x
  • ComUnity Technical Overview
  • Getting Started
    • ComUnity Developer Toolkit
      • Login
      • Manage your account: Profile, Settings, and Actions
    • Manage your project
      • Create a project
      • Project Settings
      • General
      • Build and launch your project
      • Templates
      • App Users & Roles
      • Themes
      • Versions
      • Icon Management
      • Store URLs
      • Deploy
        • Environments
        • Manual Project Deployment Across Environments
        • Configuration
    • Organisations
      • Roles and Permissions
      • Organisational Management
      • Teams
  • Toolkit Guides
    • Data
      • Customising the Data Model
      • Manage Entities in the Data Model: Step-by-Step Guide
      • Setting Up Role-Based Permissions for Entities: Access Control Configuration
      • Creating Entity Associations: Configuring Table Links
      • Manage Inheritance in the Data Model: Configuring Entity Hierarchy and Inheritance
    • Screens
      • Integrated Navigation and UI Builder for Screens in the ComUnity Developer Toolkit
      • Building Screens
        • Screen Controls
        • Navigation
          • Lists in Navigation pages
            • Dynamic List Rendering in Navigation pages
            • Adding Sub-Screens to Navigation pages Using List Navigation
          • Page Link
        • Form
          • Screen Controls
          • Lists in Form pages
            • Static Item - List Item
            • Single Item - List Item
            • Entity Items - List Item
    • Custom Classes
    • Custom Website
      • Bindings
      • Pages
        • Page Development
        • Page Elements
        • Templates
        • Resources
    • Communications
      • Configuring Dynamic Action Templates for Event-Driven Communication Channels
        • Event Details: Understanding Data Sources for Dynamic Template Building
        • Email
        • SMS & WhatsApp
        • INAPP
        • Push Notifications
        • HTTP
      • Triggering the Communication Service
      • Communication Settings
    • Events and Notifications Management
    • Observability
      • Client Analytics
      • Metrics
      • Traces
    • Third Party Services
      • Azure Function Apps
      • Azure Logic Apps
      • Integrations
      • Microsoft Fabric
      • APIs
    • Services
      • Media Server
  • General Information
    • Debugging and editing your application code
  • Toolkit Tutorials
    • Build a Simple Blog App: The Beginner's Guide to ComUnity Development
    • Building a Comprehensive News App: Integrating In-App Messaging, Push Notifications, SMS, and Email
    • APIs
      • JSON Placeholder Todos API Integration in a Simple Blog App
      • Countries GraphQL API Integration Using the APIs feature in the Toolkit
      • Integrating the JSONPlaceholder Posts API Using the Toolkit’s OpenAPI Feature
      • OData Integration with the Bookings API Using the APIs feature
    • How to Configure In-App Notifications for User Profile Updates Using Communications
  • Enhancing Cases App: Real-time Comment Notifications
  • Reference articles
    • Glossary
    • Privacy by Design
    • OData
    • Razor
    • CRUD Functions
    • Mustache Templating
    • Temporal Tables
    • Integrating WhatsApp Business with the ComUnity Platform
    • Data Types
    • Field Types
    • Table Links
    • Release Notes
    • Keyboard Shortcuts
Powered by GitBook
On this page
  • Managing Teams
  • Assign Teams to a Project
  • Assigning Teams to a Project
Export as PDF
  1. Getting Started
  2. Organisations

Teams

Managing Teams

Responsibility and Prerequisites:

The task of assigning managing teams to a project is entrusted to the Organisational Administrator.

To manage teams in the organisation, proceed as follows:

  1. Login to the ComUnity Developer Toolkit

  2. Access Organisation Settings: From the main menu, navigate to "Organisation Settings".
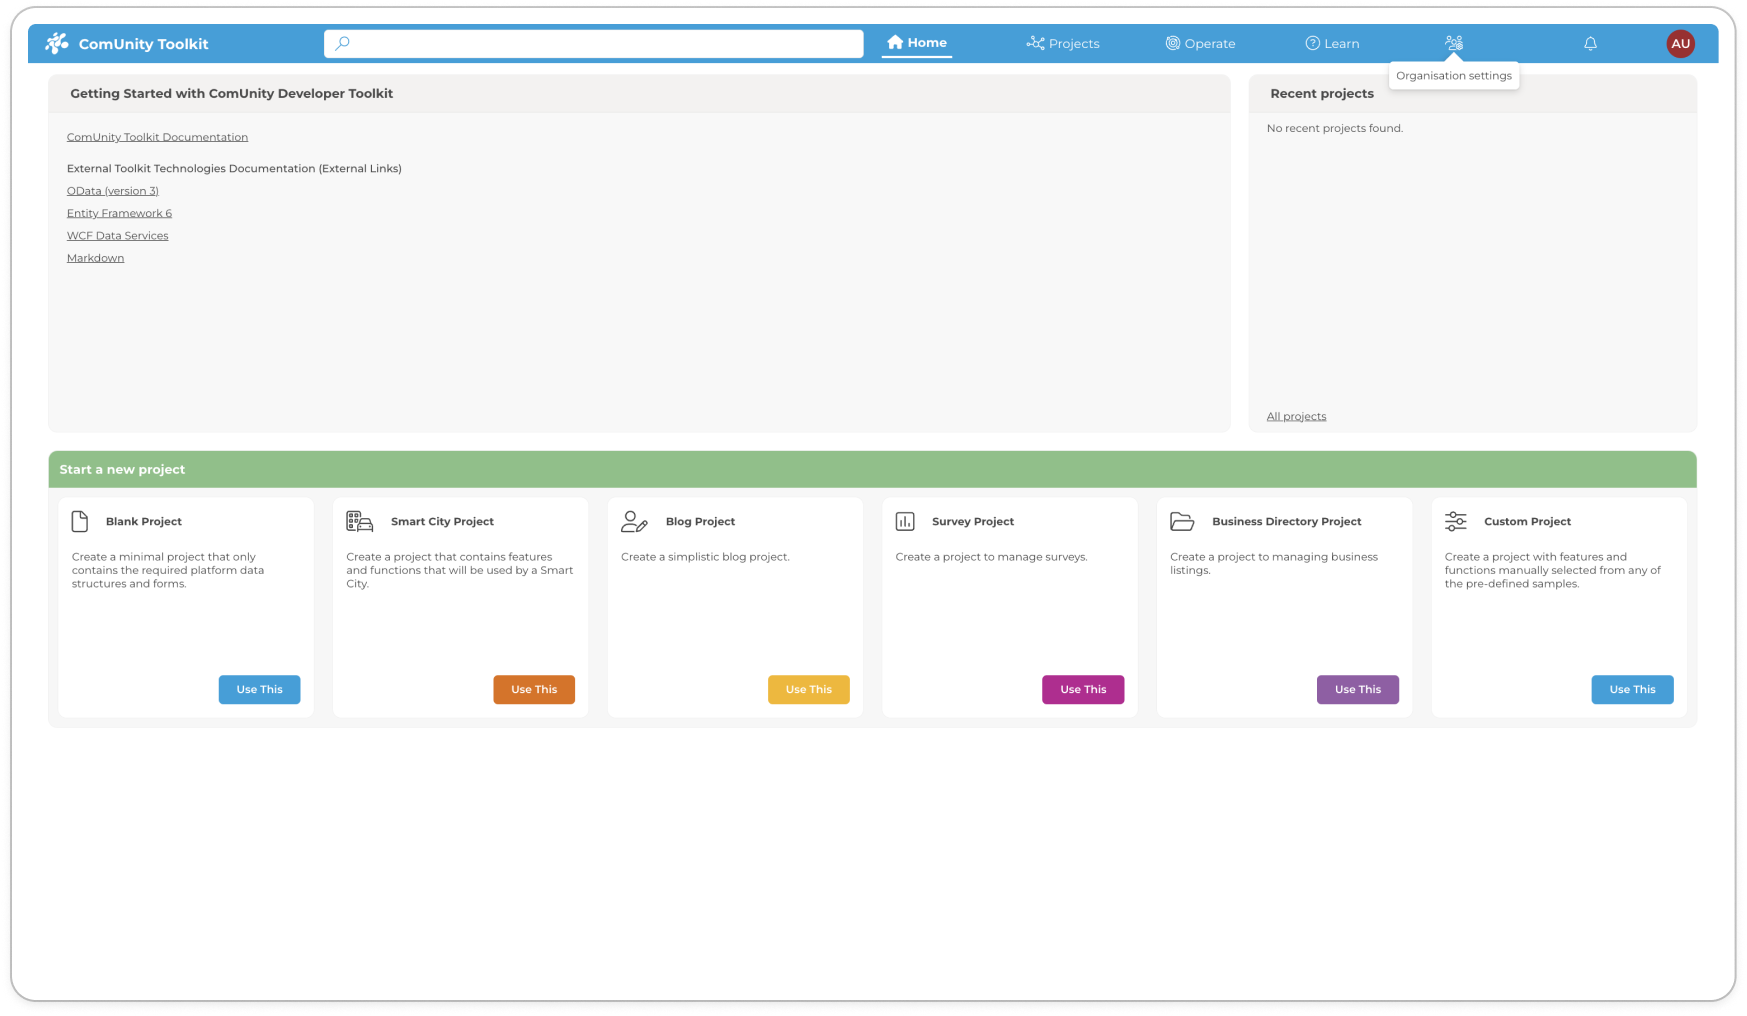
  3. Access Teams: Go to the "Teams" tab within the Organisational Settings.

  4. View Teams: This section displays all teams in your organisation.

  5. Create a Team:

    • To establish a new team, click the "+ Create Team" button.

    • In the "Create Team" modal that appears, enter the team's name and confirm the creation.

  6. View Team Members:

    • For details on a specific team, click the "View Team" button adjacent to the team's name.

    • A detailed view of the team members along with their roles will be displayed. Utilise the search function for an enhanced experience in finding specific members or roles.

  7. Delete a Team: To delete a team, click the three-dot button next to the team's name and confirm the action in the "Delete Team" modal.

Assign Teams to a Project

Responsibility and Prerequisites

The task of assigning teams to a project is entrusted to the Project Owner. Before proceeding, ensure that the necessary teams have already been established within your organisation. This step requires collaboration with the Organisational Administrator, who is responsible for creating teams and assigning members to those teams.

Assigning Teams to a Project

In the Toolkit, the flexibility of project management is enhanced by allowing Project Owners to assign teams not only after a project has been established but also directly during the project creation phase. This capability streamlines the setup process, ensuring that the right resources and teams are aligned from the outset.

Assigning Teams During Project Creation

  1. Initiate Project Creation: When creating a new project within the Toolkit, fill out the project details as prompted.

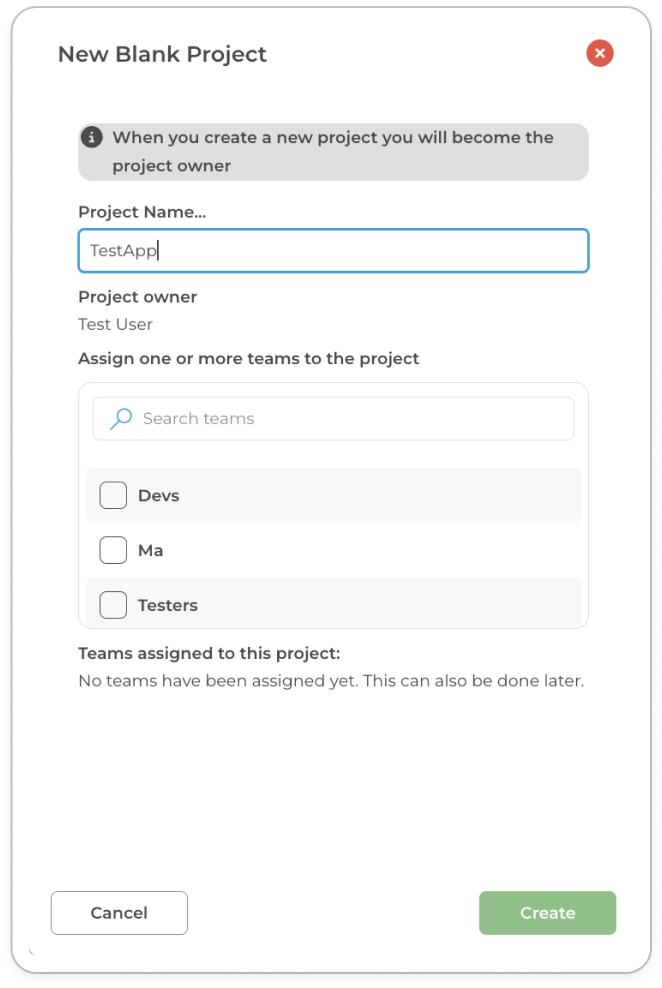
  2. Team Assignment Option: Look for the "Assign one or more teams to the project" section within the project creation interface. This step occurs before finalising the project setup.

  3. Select Teams: Choose from the list of available teams within your organisation. If the required team is not listed, remember that the Organisational Administrator can create and configure new teams.

  4. Finalise Project Creation: After selecting the desired teams, proceed to complete the remaining project details and finalise the creation process.

Assigning Teams to an Existing Project - Project Teams

For Project Owners looking to assign teams to an already existing project:

  1. Login to the ComUnity Developer Toolkit

  2. Select your Project: From the dashboard, select the project you wish to manage.

  3. Open Project Settings: After opening your project in the Toolkit, click the cog icon labelled Project Settings (displayed with a tooltip reading “Project settings”). For additional details on accessing Project Settings, refer to the General section.

  4. Navigate to Project teams: In the Project Settings window, select "Project teams."
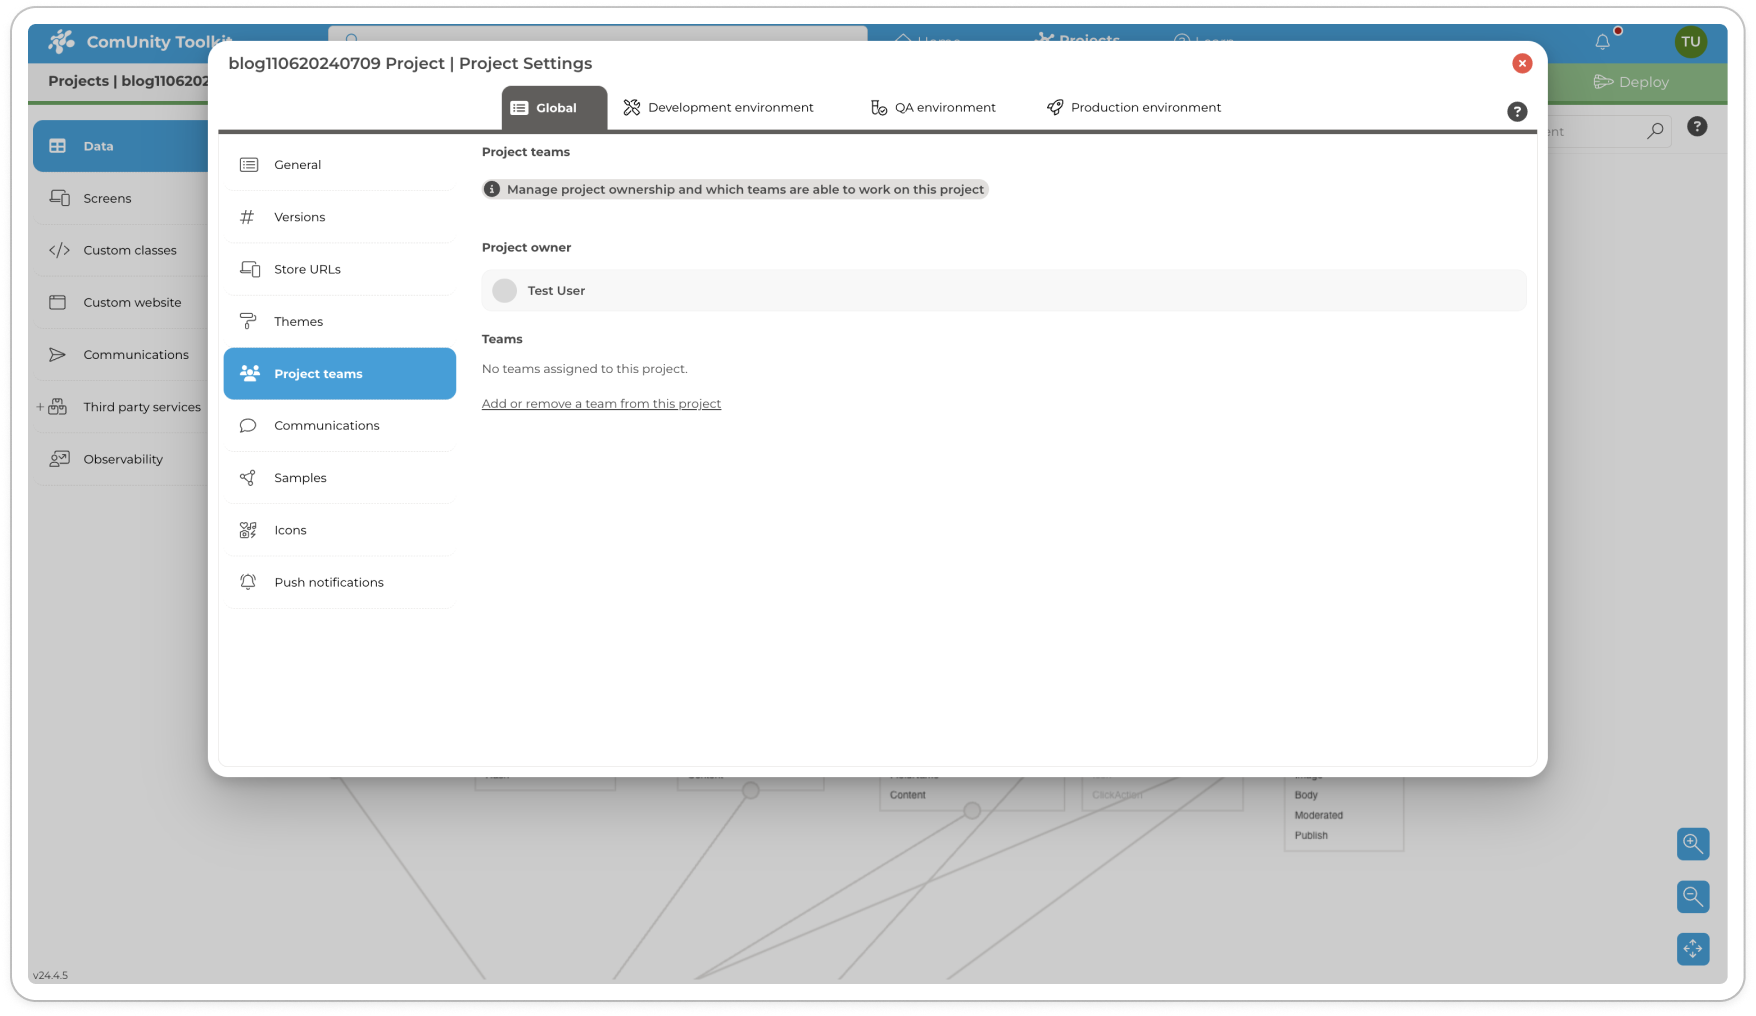
  5. Modify Team Assignments: Click on "Add or Remove a Team from this Project" to adjust your team assignments.

    • To include a team in your project, check the box next to the team's name.

    • To remove a team from your project, uncheck the box next to the team's name.

  6. Multiple Team Assignments: Remember, it's possible to assign multiple teams to a single project, enhancing collaboration and resource allocation.

The ability to customise team assignments allows Project Owners to align staffing with the necessary expertise and skills for successful project execution.

Organisation Settings
Access Teams
Project teams