
Pages
Custom web pages can only be populated with static content, dynamic content is templated into the pages as independent page elements.
To create a page in your Custom Website, follow these steps:
Open your project in the Toolkit and navigate to Custom Website then select the Pages tab.
Locate the Add a Page button and click on it to add a new page.
A modal window titled Add a Page will appear on your screen.
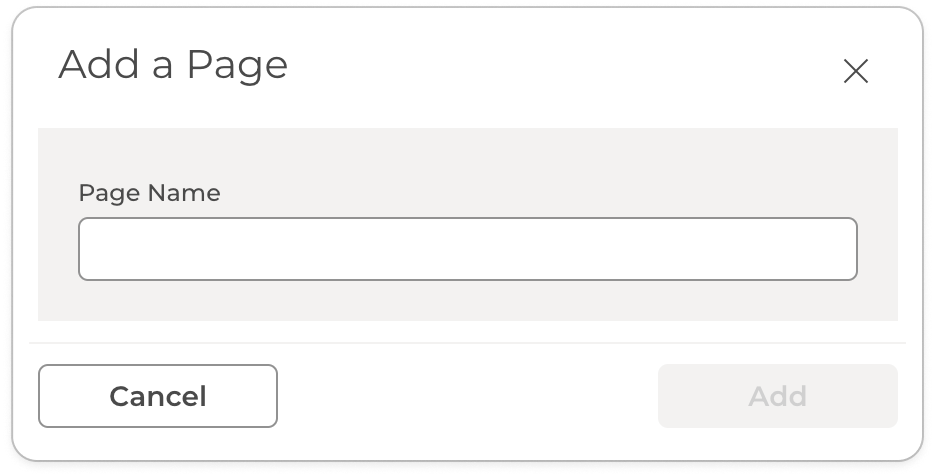
In the modal window, provide a add a unique page name in the designated Page Name box.
Finally, click Add.
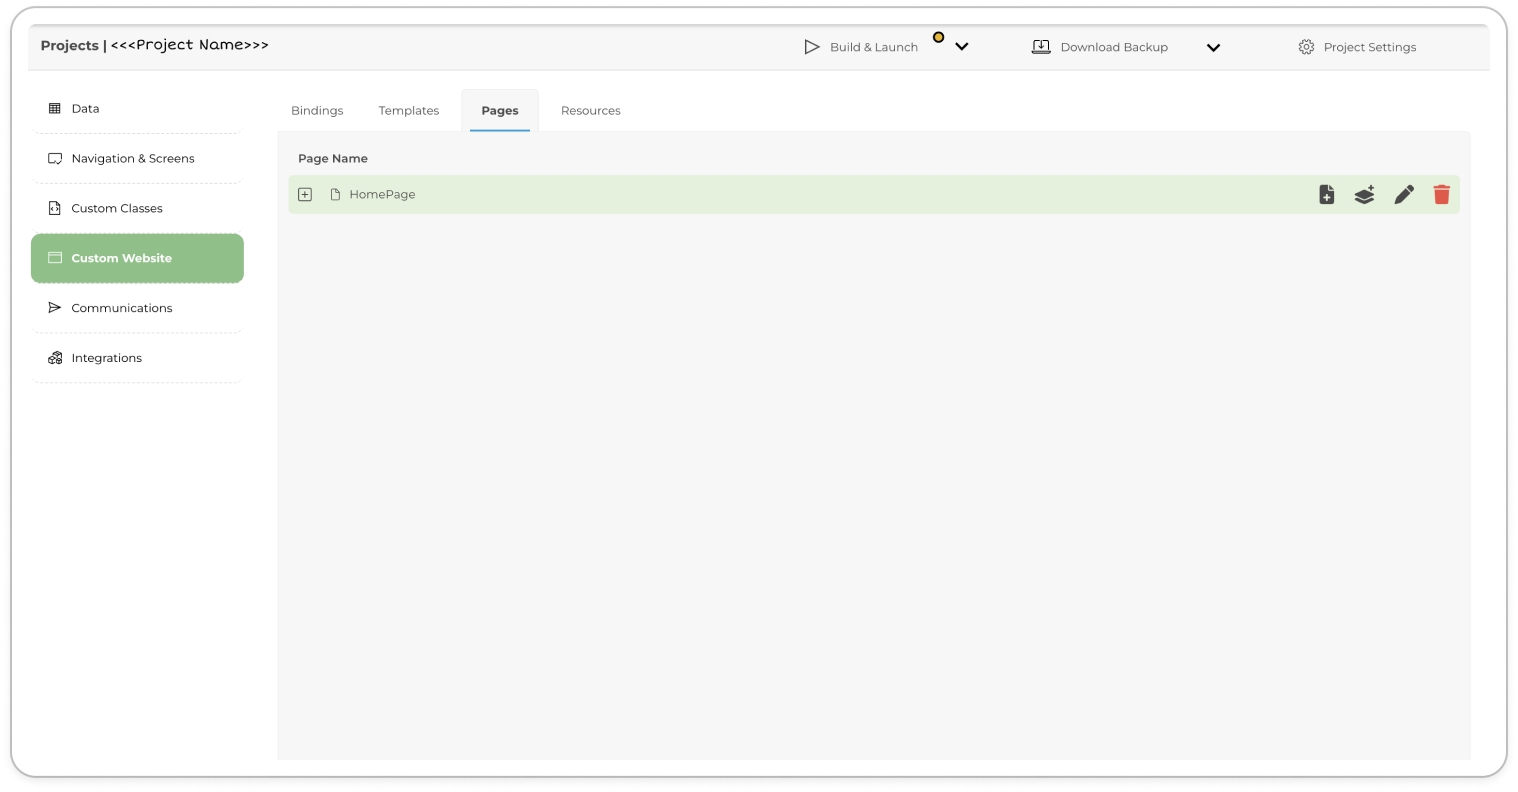
Once you have created a page within your custom website using the ComUnity Developer Toolkit, you can proceed to build and customise its content. The Toolkit provides various options to manage your pages efficiently. You can insert page elements, add child elements to your pages, or delete pages as needed. The page structure is organised hierarchically, allowing you to expand and collapse pages to view their child elements.
To ensure a seamless and user-friendly experience on your Custom Website, the ComUnity Developer Toolkit provides several essential functions that allow you to efficiently manage and structure your pages. Let's explore these functions in detail:
Build Page Content
To create a truly tailored web experience, the ComUnity Developer Toolkit provides a comprehensive range of page settings that enable users to customise the visual presentation and functionality of their individualised website pages. To access these settings, users should designate a specific page and select the corresponding icon from a set of options. These icons facilitate various functions, including editing the page, adding page settings, deleting the page, and adding a child page in the hierarchy. By selecting the appropriate icon, users will initiate the unveiling of a modal dialog that exclusively showcases the page settings pertaining to the chosen page.
The following functions are key components for building engaging web content:
Page Development: During the page development process in the ComUnity Developer Toolkit, you have the ability to configure various page settings and elements. This includes setting parent pages, creating dynamic page elements, and utilizing templates and resources to enhance your web pages. By leveraging these features, you can create compelling and informative textual and multimedia content for your web pages.
Page Elements (Dynamic): Developers have the ability to create custom page elements to meet their specific requirements. These page elements are utilities provisioned by the ComUnity Developer Toolkit and can be used to implement CRUD (Create, Read, Update, Delete) functionality in custom website pages. Developers can design and implement page elements that interact with the Data service, enabling the manipulation and display of dynamic data within their web pages.
Templates: Create templates that enable the development of modular page elements like headers, footers, and reusable components. These templates provide a consistent structure and layout for your website, ensuring a cohesive user experience while allowing for efficient and scalable development.
Resources: Incorporate external resources into your web pages seamlessly. Embed images, videos, audio files, or other documents from various sources to enrich your content and provide a more interactive user experience.
Child Pages: Establish a hierarchical structure for your website by adding child pages. By creating child pages, you can organise and categorise your content effectively, providing visitors with a clear navigation path and logical information flow.
By leveraging these diverse functions, developers can create highly personalised and dynamic web pages that cater to their specific needs. The ComUnity Developer Toolkit empowers developers with the tools necessary to design, customise, and structure their web content efficiently and effectively. This includes the creation of custom page elements for implementing CRUD functionality, the utilisation of templates for modular page elements, and the incorporation of external resources for enhanced content.