
Build and launch your project
When you build your project the ComUnity Developer Toolkit the build service provisions resources for your app on Microsoft Azure and then builds your Data Service project based off your data model definition. If a database exists it then runs a data migration. After a successful build it then publishes your project to Internet Information Services(ISS).
Failure to rebuild your project after modifying the data model, custom classes, or virtual entities can result in data loss and inconsistencies. Rebuilding is crucial to publish changes on Internet Information Services (IIS) and ensure the integrity of your application.
Don't risk losing your work - always remember to rebuild your project for proper deployment.
To build your project in the Toolkit go to your project Settings, located under the navigation bar on the right-hand side, you will find the Build & Launch controls displayed below:
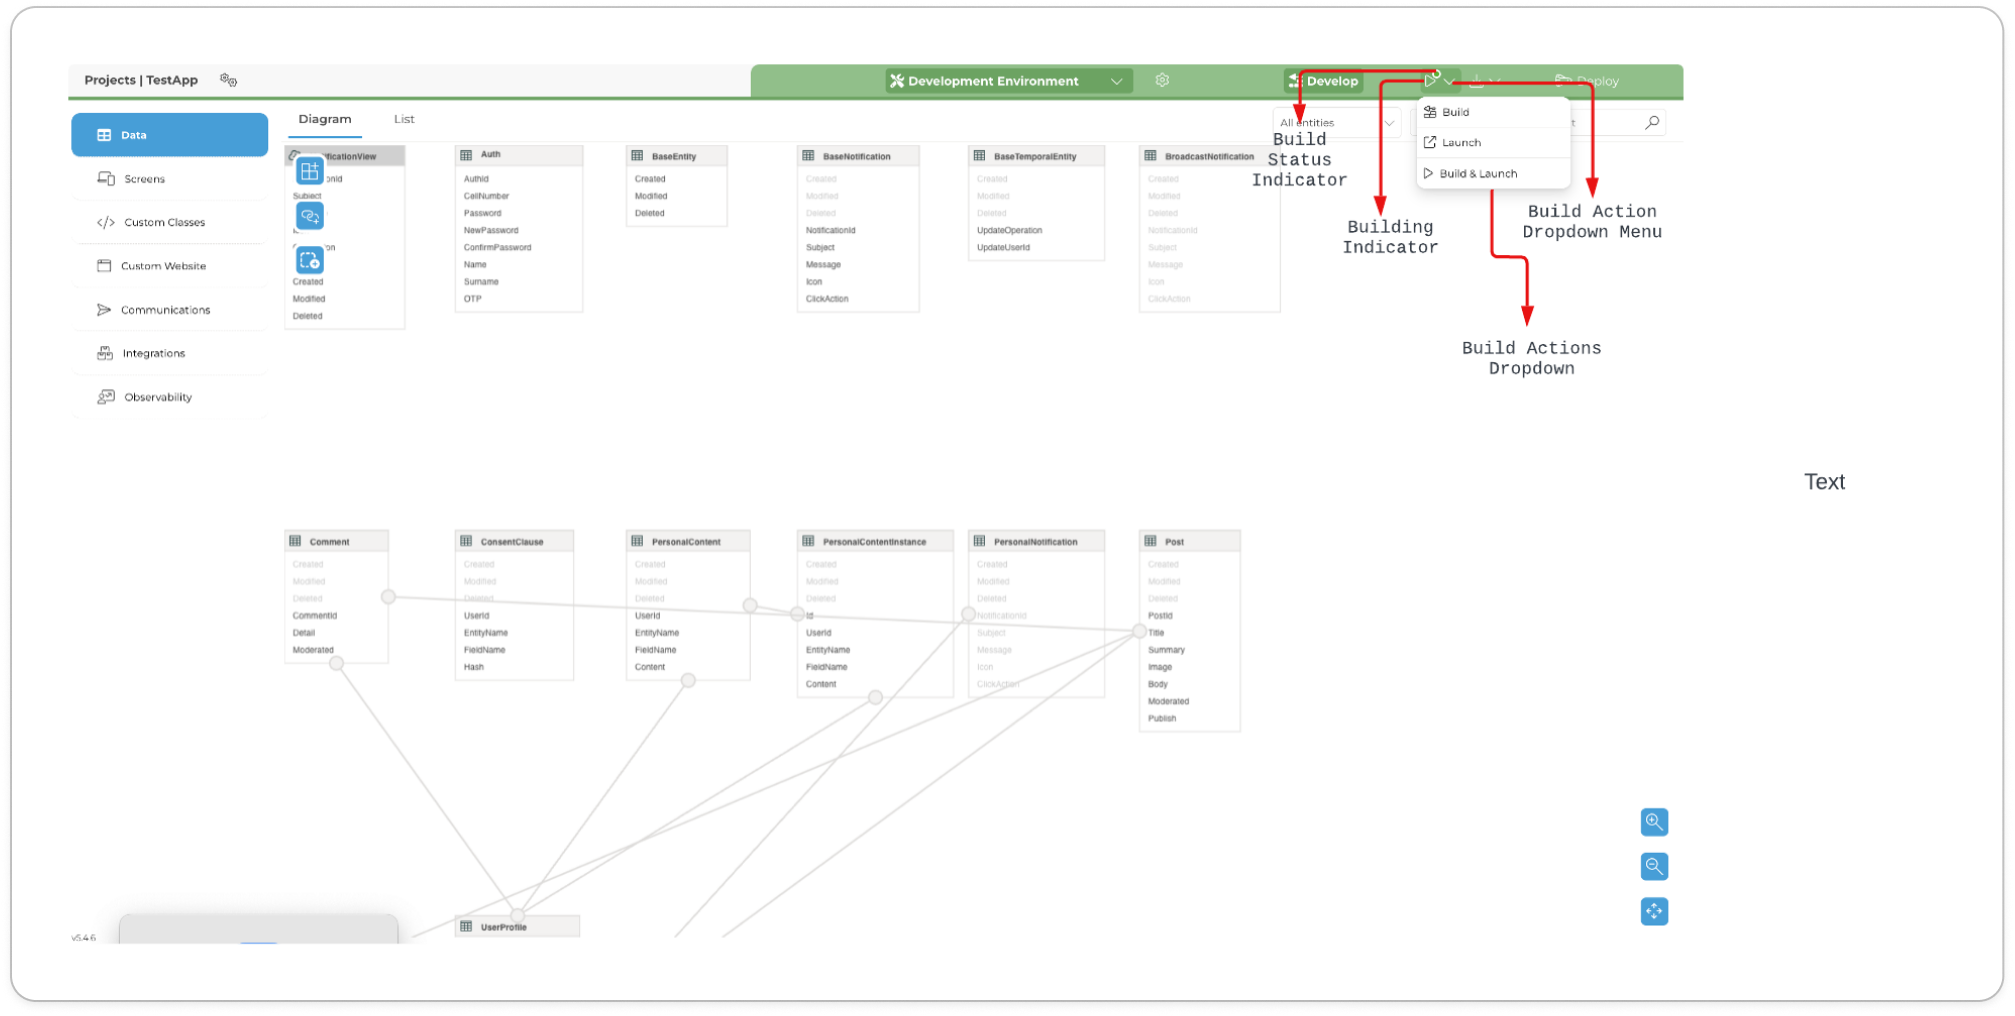
Build Status Indicator: The Build Status Indicator serves as a visual representation of your project's build status. By default, it appears as yellow and changes colour based on the outcome of the build process. After a successful build, it displays a green colour, while a red colour indicates a failed build.
Build Action Dropdown Menu Button: Clicking on the Build Action Dropdown Menu Button reveals a menu that displays the supported Build Actions. This button allows you to toggle the visibility of the dropdown menu for easy access to these actions.
Build: The Build action is a critical step in initiating the build process for your project. When you click on the Build action, a modal window will appear on your screen, providing important information about the build progress.
Within the modal, you will find the following components:
Progress Bar: This visual element allows you to track the progress of your build. It provides a visual representation of how far the build process has advanced.
Completed Steps Counter: This counter displays the number of build steps that have been successfully completed. It helps you keep track of the progress made by the build process.
Launch project when done Checkbox: By selecting or deselecting this checkbox, you can control whether the project will be automatically launched after the build process is complete. Choose according to your requirements.
Hide Window: If you wish to dismiss the modal window, simply click on the "Hide Window" button. This action will close the modal and allow you to continue monitoring the build progress and outcome.
To view the progress and outcome of your build, navigate to the top of your project Settings page, just below the navigation bar, where the Build controls are displayed. Here, you can observe the ongoing build progress and the outcome of the most recent build. This section provides you with a convenient overview without the need to keep the modal window open.
By utilising these features, you can effectively manage and monitor the build process of your project within the ComUnity Toolkit.

Build Progress
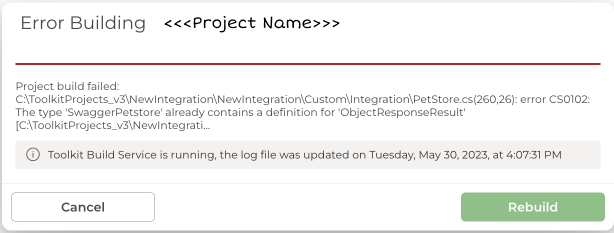
It's important to note that errors can occur during the build process. If an error occurs, the build outcome indicator will display a red colour to indicate a failed build. In such cases, you may need to review the error messages or logs to identify and resolve the issues that caused the build failure.
Build & Launch: The Build & Launch action combines the build process with the automatic opening of the web version in a new browser tab. By selecting this action, your project will be built, and the web version will be launched automatically. Please ensure that browser popups are enabled for your launch to work. This build action is selected by default, providing a streamlined approach to building and launching your project.
Launch: The Launch action allows you to directly open the web version of your project in a new browser tab. By choosing this action, you can quickly access and view your project without going through the build process. This option is ideal if you have previously built your project and want to launch it again without any modifications.