Building Screens
Introducing screens and providing instructions for effective screen management
Overview
Screens form a fundamental and powerful feature within the ComUnity Toolkit, providing developers with the ability to efficiently design and manage navigation and content structure in their applications. This feature relies on a specialised recursive hierarchy structure, offering a seamless and intuitive approach to organising, navigating, and presenting information to users.
The root node is the top-level container for all of the screens. The root node can have child nodes, which can be either a Page or List, forming the foundational top-level screens. Each node boasts a distinct purpose, capable not only of encompassing other containers like Lists and Pages but also of accommodating specific screen controls tailored to its function.
Within this hierarchical structure, each node is classified into specific and well-defined types:
List: The role of a List within an application's architecture is dynamic and versatile, determined by its position in the hierarchy and how it's configured. If a List is a container node, it can contain Pages or other Lists and any other relevant Screen Controls. You should use a List as a container if you want to implement complex navigation. Lists embedded containers can be used to showcase data in both static and dynamic formats and/or they can be configured to point to sub screens. This adaptability even extends to the presentation of list items, offering options such as grids and tabs that enhance the visual representation.
Page: Pages are container nodes, meaning that they can have child nodes i.e they can contain Pages or Lists as well as Screen Controls essential for CRUD operations - form handling, and dynamic lists.
When you select a node within your screen hierarchy, the associated Screen Controls and relevant properties become visible and accessible. This user-friendly feature enhances the ease of managing and customising the selected item, enabling you to fine-tune its behaviour, appearance, and functionality according to your specific requirements.
In summary, comprehending the underlying architecture and behaviour of your application's screens is pivotal. Understanding the interaction between different node types, their capabilities, and their hierarchical arrangement empowers you to design complex apps with ease.
Navigation in ComUnity applications is supported by enabling users to traverse through application screens in the navigation hierarchy.
Managing Screens
When building your application's navigation in the ComUnity Toolkit, it is essential to approach it as a hierarchical structure. This hierarchical nature enables you to organise and structure your navigation system effectively.Here, we explore key considerations for managing Screens within the ComUnity Toolkit:
Top-Level Screens as your application's Main Menu: The top-level screens form the main menu of your application. These Screens serve as the primary interface for users to access different sections or functionalities. Design your main menu with clarity and logical organisation to provide an intuitive pathway for users to navigate through your application.
Creating Parent and Child Screens: When building your application's navigation in the ComUnity Toolkit, you have the flexibility to create parent and child screens, allowing you to establish a hierarchical relationship between them.
By building your navigation with the mindset of a hierarchical structure, leveraging parent-child relationships, and utilising the drag and drop functionality, you can create a well-organised and intuitive navigation experience for your application users.
Configuring Top-Level Screens in Your Application
Building a well-organised and user-friendly navigation system is fundamental to delivering an exceptional user experience in your application. One crucial aspect of navigation design is creating top-level pages that serve as primary entry points to different sections or functionalities. In this section, we will guide you through the process of creating a top-level page in your application using the ComUnity Toolkit.
To create a top-level page, follow these steps:
Open your project in the ComUnity Toolkit and select the Screens tab on the sidebar.
In the Screen View under the Screens tab, click on the Screen you wish to set as a top-level page.
Next, click on the ellipsis icon next to the selected Screen.
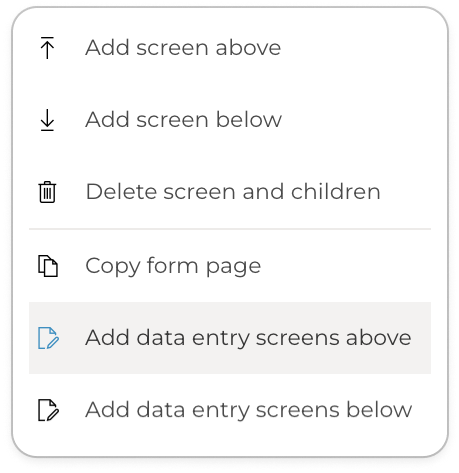
A modal will appear, providing options for configuring the Screen as a top-level page (screenshot shown below).


In the modal window, click the Add screen above tab to insert a new navigation directly above the active page. Alternatively, click the Add screen below tab to insert a new navigation directly below the active screen.
An Add a new screen modal window (see screenshot below) will appear. In the Title box, enter a unique title for the screen.

Select a type from the options available. The supported Screen types in the ComUnity Toolkit are Navigation and Form pages.
Click Add a screen to create the new Screen with the specified title and type.
Congratulations on successfully creating your new top-level screen and establishing it as a fundamental component of your project's navigation!
To further enhance your Screens and tailor them to your project's specific needs, we encourage you to explore the detailed content available on Navigation and Form pages. These resources offer valuable insights, technical guidance, and best practices for building screens based on their respective types.
Organising Your Navigation Hierarchy
In the hierarchical structure of application navigation, child pages play a crucial role in enhancing content organisation and user experience. The ComUnity Toolkit fully supports child pages in both Form and Navigation Pages, allowing you to create nested levels of content within your application.
By leveraging the flexibility of screen controls, you can seamlessly configure child pages within screens, offering users a structured and intuitive way to navigate through your app's content.
Key Points to Consider:
Page Links in Navigation Pages for Child Screens: Child pages are implemented with Page Links, establishing hierarchical relationships between parent and child pages. These links serve as connectors that enable users to navigate smoothly between related content, view Page Link for additional details.
Static List Items in Form Pages for Child Screens: You can create a list and add a static list item, then define an Action URL (relative path) property directing the parent to the Child screen. This method provides a straightforward way to link and organise content within Form Pages, for more details view Using a Static List Item to create a navigation between a Form page and an existing screen.
Dynamic Lists in Form Pages and Child Screens: Dynamic List items can be linked to child pages, providing dynamic and context-specific navigation paths. This powerful combination allows you to create adaptable navigation structures that cater to various user interactions. To learn more about linking list items to pages, see Dynamic List Rendering and Rendering Data from Entity Associations in Form Pages.
Data Entry Screens
The central focus when utilising Data Entry Screens within the ComUnity Toolkit is to significantly expedite the process of generating multiple screens, eliminating the need for individual construction. This feature introduces a time-saving mechanism by automating the creation of screens that showcase data linked to specific entities. These screens also incorporate dedicated screens for the inclusion and modification of records.
The Data Entry Screens encompass three distinct screens, each serving a pivotal role within the data management workflow:
Top-Level Screen (View Records in List View): The Top-Level Screen provides a comprehensive list view of records, enabling users to navigate through the records effortlessly. Each list item functions as a clickable link, directing users to detailed information about individual records. Additionally, this screen offers a link to conveniently access the Add Record Screen.
Edit Record Screen: Users can seamlessly transition to the Edit Record Screen by selecting a specific record from the list view. This specialised interface facilitates precise modification and updating of selected record data. The detailed form within this interface mirrors the attributes of the record, equipping users with interactive elements such as input fields, dropdown menus, and checkboxes. These elements enable thorough editing based on specific requirements.
Add Record Screen: Accessible exclusively from the Top-Level Screen, the Add Record Screen provides an intuitive form for creating new records. This user-friendly form guides users through the process of inputting necessary data for the creation of new records.
The ComUnity Toolkit seamlessly integrates Data Entry Screens with a straightforward click, while allowing room for further customisation. Developers possess the ability to align these screens precisely with the unique requirements of their applications. This level of customisation empowers developers to seamlessly integrate and refine Data Entry Screens, fostering a unified and responsive application interface.
The utilisation of Data Entry Screens is not only a means of accelerating development, but also a pathway to optimising the user experience and functionality of the application.
To create Data Entry Screens, follow these steps:
Open your project in the ComUnity Toolkit, select the Screens tab on the sidebar.
In the Screen View, you will find a list of all Screens available in your application navigation.
In the Screen View under the Screens tab, click to select the target Screen where you intend to position the top-level screen for your Data Entry Screens – this can be either above or below the selected Screen.
Next, click on the ellipsis icon next to the selected Screen.
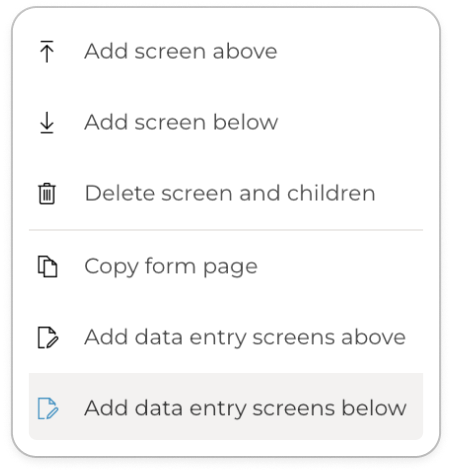
A modal will appear, providing options for configuring the Screen as a top-level page (screenshot shown below).


Select one of the following relevant options: Add data entry screens above or Add data entry screens below. This will prompt the Add data entry screens modal to appear (screenshot below).

Inside the Add data entry screens modal, you'll find an Entity dropdown. Carefully select the desired entity for which you wish to establish Data Entry Screens.
Finally, click the Add Screens button. This action will seamlessly integrate your Data Entry Screens for the chosen entity.
In conclusion, upon the successful generating of your Data Entry Screens, a top-level screen named in accordance with the specified entity will seamlessly integrate into the designated position, accompanied by the remaining screens nested within. This strategic arrangement allows for effortless access and management. Moving forward, feel free to tailor these screens to align precisely with your preferences, following the familiar process of customising standard screens view Form Pages and Navigation Pages, for more details.

View Screens
The navigation of your application is organised as a hierarchical tree structure of pages. To navigate through the tree and explore the different levels of your navigation system, follow these steps:
Expand a Screen: If a Screen has children, you will see a (+) icon next to it. Click the (+) icon to expand the navigation, revealing its child screens and sub-levels.
Collapse a Screen: To simplify the view and collapse a Screen and its child screens, click the (-) icon next to the expanded navigation.
By utilising these expand and collapse icons, you can easily navigate through the hierarchical structure of your application's navigation, allowing for a clear understanding of the relationships and organisation of the different navigation nodes.
Delete a Screen
In the ComUnity Toolkit, the Delete a Page feature provides a straightforward method to efficiently remove unnecessary or outdated pages from your application. This powerful tool streamlines the page management process, allowing you to maintain a clean and organised project.
To delete a Screen and its children, follow these steps:
Open your project in the ComUnity Toolkit and select the Screens tab on the sidebar.
In the Screen View under the Screens tab, locate and click on the Screen you wish to delete.
Click on the ellipsis icon next to the selected Screen.
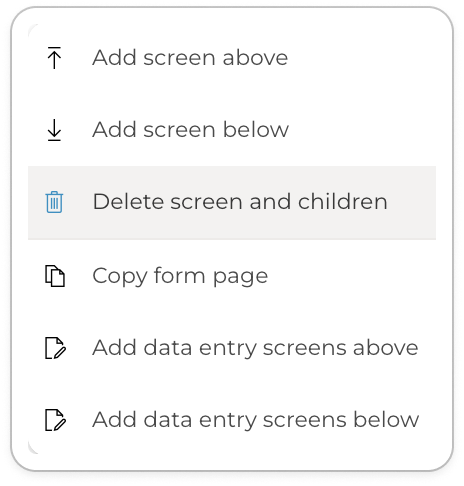
A modal will appear, providing an option to delete a screen and its children (screenshot shown below):

Within the modal window, click Delete screen and children. This action will trigger a "Delete screen" modal (screenshot shown below):

Delete screen modal Finally, click the Delete button in the modal to confirm the deletion of the child screen and its descendants.
This straightforward process allows you to efficiently remove both the child screen and any associated sub-screens, ensuring your application's hierarchy remains well-organised.
Copy form page
The Copy Form Page function serves as a convenient utility, enabling the swift generation of Form pages by duplicating existing ones. This feature proves particularly valuable when expediting the process of crafting form-based interfaces. By leveraging this functionality, developers can efficiently replicate the structure and design of pre-existing pages, expediting the creation of new form pages with consistent styling and elements.
