Take charge of your teams and resources with the Organisations feature in ComUnity Toolkit. This powerful suite streamlines organisational management, empowering you to build productive teams, control access, and ensure smooth collaboration.
Effortless Organisation Management: Manage organisations with ease and handle administrative tasks efficiently and maintain a clear structure.
Build Ideal Teams: Add, remove, and group team members intuitively. Assign roles and permissions to ensure the right people are on the right projects.
Granular Access Control: Define and update permission levels for each team member and resource. Safeguard sensitive information and prevent unauthorised access.
Secure Collaboration: Control who sees what, setting clear boundaries and promoting a culture of trust and productivity.
In the dynamic environment of the Toolkit, roles and permissions are foundational elements that ensure secure, efficient, and effective management of projects and teams within an organization. Understanding the distinct roles within the Toolkit and the permissions associated with each is crucial for users to navigate and utilise the system to its full potential.
Roles within the Toolkit are designed to cater to various levels of responsibility, from system-wide oversight to specific project tasks. These roles facilitate a structured approach to project management, allowing for clear delineation of duties and access control. Permissions linked to these roles define what actions a user can perform, ensuring that sensitive operations and information are accessible only to authorised individuals.
This section of the documentation aims to provide a comprehensive overview of the roles available within the Toolkit, detailing the permissions each role holds and the significance of these roles in the overall management of projects and organisational settings. Whether you are a Toolkit Administrator managing the system at a global level, an Organisational Administrator overseeing projects and teams, or a Developer contributing to project tasks, understanding your role and permissions is the first step towards maximising your effectiveness and contribution within the Toolkit.
By the end of this section, you will have a clear understanding of how roles and permissions work in tandem to support a secure, organised, and collaborative environment for all users involved in project and team management.
In modern project management, clear roles and responsibilities are essential for operational efficiency and success. The Toolkit is designed to support organisations with a well-defined role hierarchy, ensuring smooth project development from strategic oversight to detailed task execution.
The Toolkit framework assigns specific permissions and responsibilities to each team member, from Organisational Administrators to Developers and Designers. This structure fosters effective collaboration and access control, ensuring everyone contributes to the organisation's goals. By outlining this role hierarchy, we highlight the importance of organised collaboration and access control within the platform.
Understanding your role within this structure is the first step toward leveraging the Toolkit's full potential and driving your organisation's success. Whether you're managing the organisation or contributing your expertise, the Toolkit's framework helps maintain order and efficiency in collaborative projects.
Toolkit Administrator
Positioned at the highest level, the Toolkit Administrator has system-wide access and control over all organisations, projects, and users within the Toolkit. This role is responsible for the overall management and configuration of the Toolkit, including user and organisation approvals.
Organisational Administrator
This section outlines the user role journey from initial signup:
Initial Signup: A new user signs up to the Toolkit, representing a company or an individual with the intent to partner and build applications within the platform.
Initial Role Assignment: Upon signup, if the user is the first or only member of their organisation within the Toolkit, they are most likely to be made an Organisational Administrator. This role grants them the ability to manage the organisation's presence within the Toolkit, including project and user management.
Role Expansion: As the platform evolves, the plan is for Organisational Administrators to be able to invite new users into the organisation. These new users would immediately have access to the Toolkit, and their roles within the organisation can be set by the Organisational Administrator. This functionality aims to streamline the onboarding process for new users and facilitate role assignment within the organisation.
Lead Developer
Developer
Operations
Viewer
1: View only
3: Full access (view and edit)
This format organizes the roles and their permissions in a clear tabular manner, making it easier to understand which components each role has access to and in which environments.
Positioned at the top of the organisational hierarchy is the Organisational Administrator, who has full control over all aspects of their organisation within the Toolkit. This includes managing users, creating teams and assigning team members, managing projects, assigning project owners, and overseeing the assignment of various teams and roles within the organisation. The Organisational Administrator can view all projects, reassign project ownership, and edit team compositions.
Project Owner
The Project Owner has control over a specific project, including visibility and editing rights. Initially, they are the sole individual with access to the project until they assign teams to it. The Project Owner can manage the project details, progress, and team assignments but operates under the governance of the Organisational Administrator.
Teams (Developers, Lead Developers, Testers, DevOps etc.)
Teams consist of individuals with roles such as Developer, Lead Developer, and other specialised roles defined within the organisation. These roles have specific permissions related to project development, such as editing project files, contributing to development tasks, and collaborating with other team members. The composition and assignment of these teams are managed by Project Administrators and overseen by Project Owners and the Organisational Administrator.
Individual Contributors (Developers, Designers, Testers, DevOps etc.)
At the project level, individual contributors work within their teams on specific tasks and projects. They have access and editing rights to projects they are assigned to and follow the directions of their team leaders (e.g., Lead Developers) and project governance established by Project Owners and Administrators.
Manual Role Assignment (Current State): Currently, if another member of the organisation needs access to the Toolkit, they must register independently. The Toolkit Administrator then manually assigns this new user to the organisation, after which the Organisational Administrator can set their roles, such as Developer, Lead Developer, Tester , DevOps or any other defined role within the system.
Toolkit Administrator Role: The Toolkit Administrator plays a crucial role in this process, as they are responsible for approving registrations, creating organisations, and assigning users to organisations. This role is essential for the initial setup and ongoing management of user roles and organisation structures within the Toolkit.
Download Backup
DEV
Full (3)
Environment Settings
DEV
Full (3)
Environment Settings
PROD
Full (3)
Environment Settings
QA
Full (3)
Operate
PROD
Full (3)
Operate
QA
Full (3)
Project Settings
DEV
Full (3)
Project Settings
PROD
Full (3)
Project Settings
QA
Full (3)
Communications
DEV
Full (3)
Custom Classes
DEV
Full (3)
Custom Website
DEV
Full (3)
Data
DEV
Full (3)
Integrations
DEV
Full (3)
Observability
DEV
Full (3)
Observability
PROD
Full (3)
Observability
QA
Full (3)
Screens
DEV
Full (3)
Deploy to QA
DEV
Full (3)
Deployment history
DEV
Full (3)
Deploy to Production
QA
Full (3)
Deployment history
QA
Full (3)
Operate
PROD
Full (3)
Operate
QA
Full (3)
Observability
DEV
Full (3)
Observability
PROD
Full (3)
Observability
QA
Full (3)
Download Backup
DEV
View (1)
Operate
PROD
View (1)
Operate
QA
View (1)
Communications
DEV
View (1)
Custom Classes
DEV
View (1)
Custom Website
DEV
View (1)
Data
DEV
View (1)
Integrations
DEV
View (1)
Observability
DEV
View (1)
Observability
PROD
View (1)
Observability
QA
View (1)
Screens
DEV
View (1)
Build & Launch
DEV
Full (3)
Deploy
DEV
Full (3)
Deploy
QA
Full (3)
Develop
DEV
Build & Launch
DEV
Full (3)
Deploy
DEV
Full (3)
Deploy
QA
Full (3)
Develop
DEV
Environment Settings
DEV
Full (3)
Environment Settings
PROD
Full (3)
Environment Settings
QA
Full (3)
Develop
DEV
Build & Launch
DEV
View (1)
Deploy
DEV
View (1)
Deploy
QA
View (1)
Develop
DEV
Full (3)
Full (3)
Full (3)
View (1)
Organisational Management within the Toolkit is a comprehensive feature designed to empower the Organisation Administrator with the tools and capabilities necessary for effective management and oversight of their organisation. This functionality is pivotal in maintaining a structured, efficient, and collaborative environment within the platform.
The Organisation Administrator is the key individual responsible for managing their organisation within the Toolkit. They are the first point of contact and register the organisation on the platform.
Managing Users: Granting access, assigning roles, and maintaining user accounts within the organisation.
Creating and Managing Teams: Establishing teams, assigning members, and managing their composition.
Project Management: Overseeing projects, assigning project owners (leaders), and ensuring efficient project execution.
In essence, the Organisation Administrator holds the highest level of authority within the Toolkit, granting them comprehensive control over their organisation's functionality.
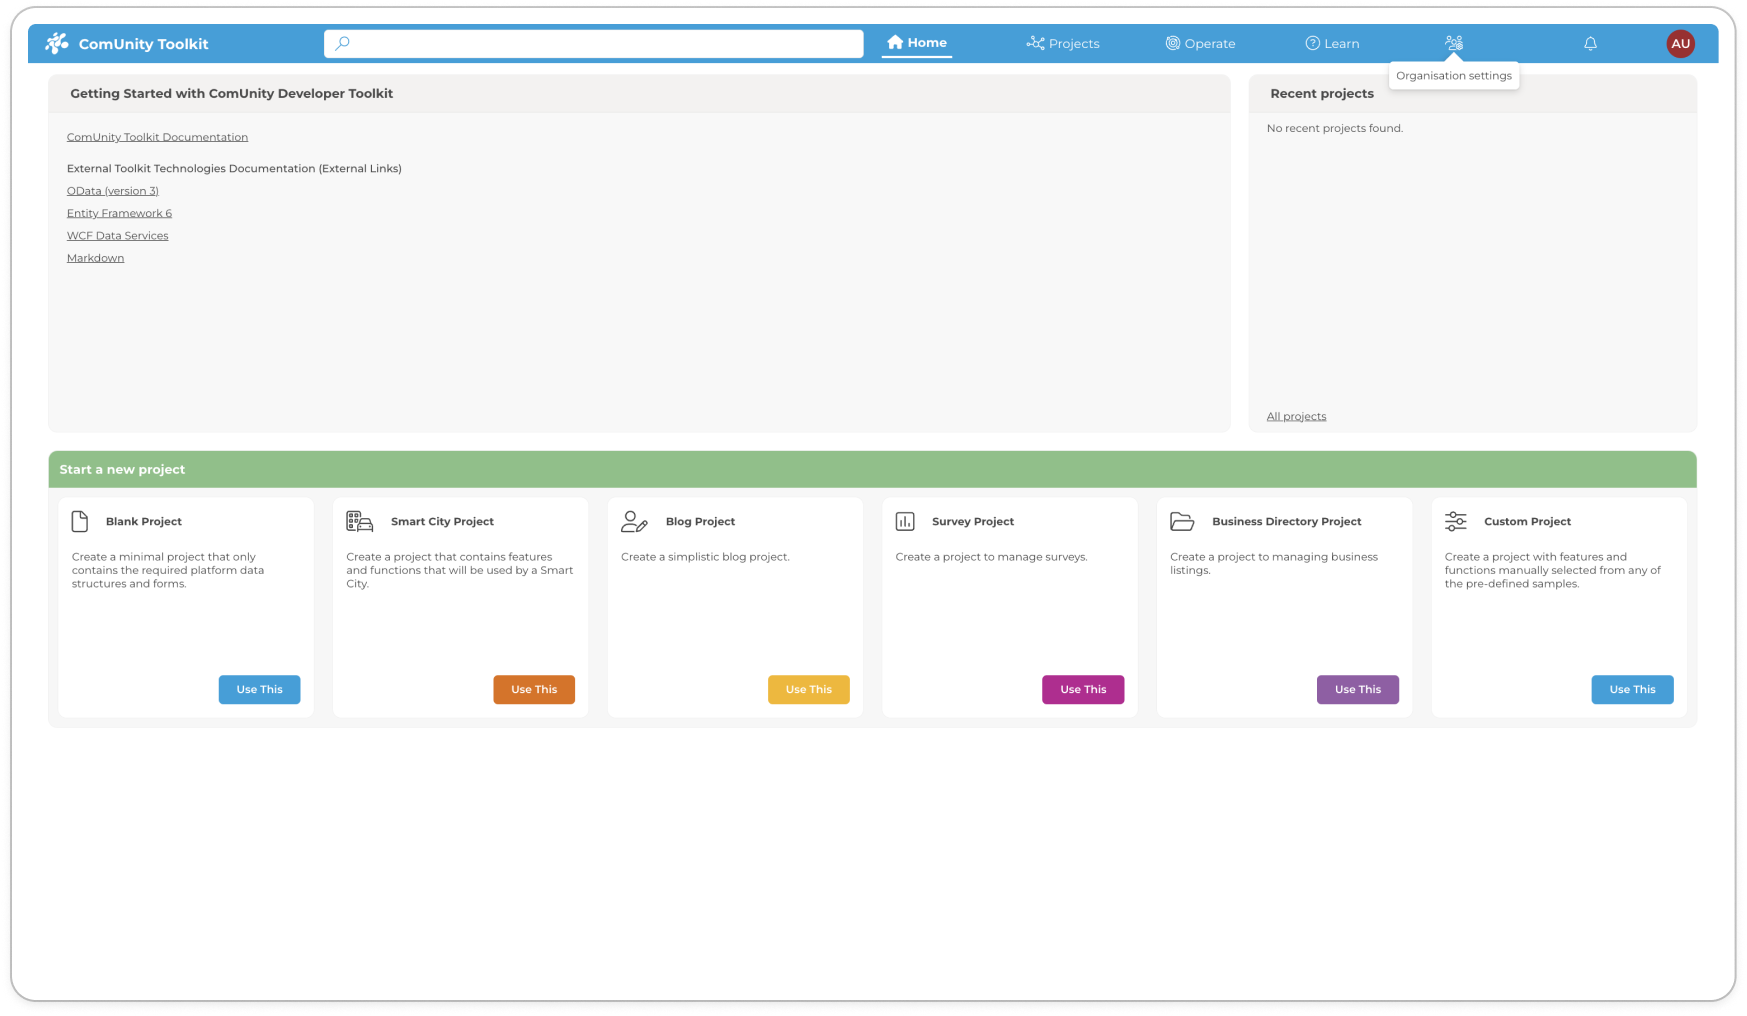
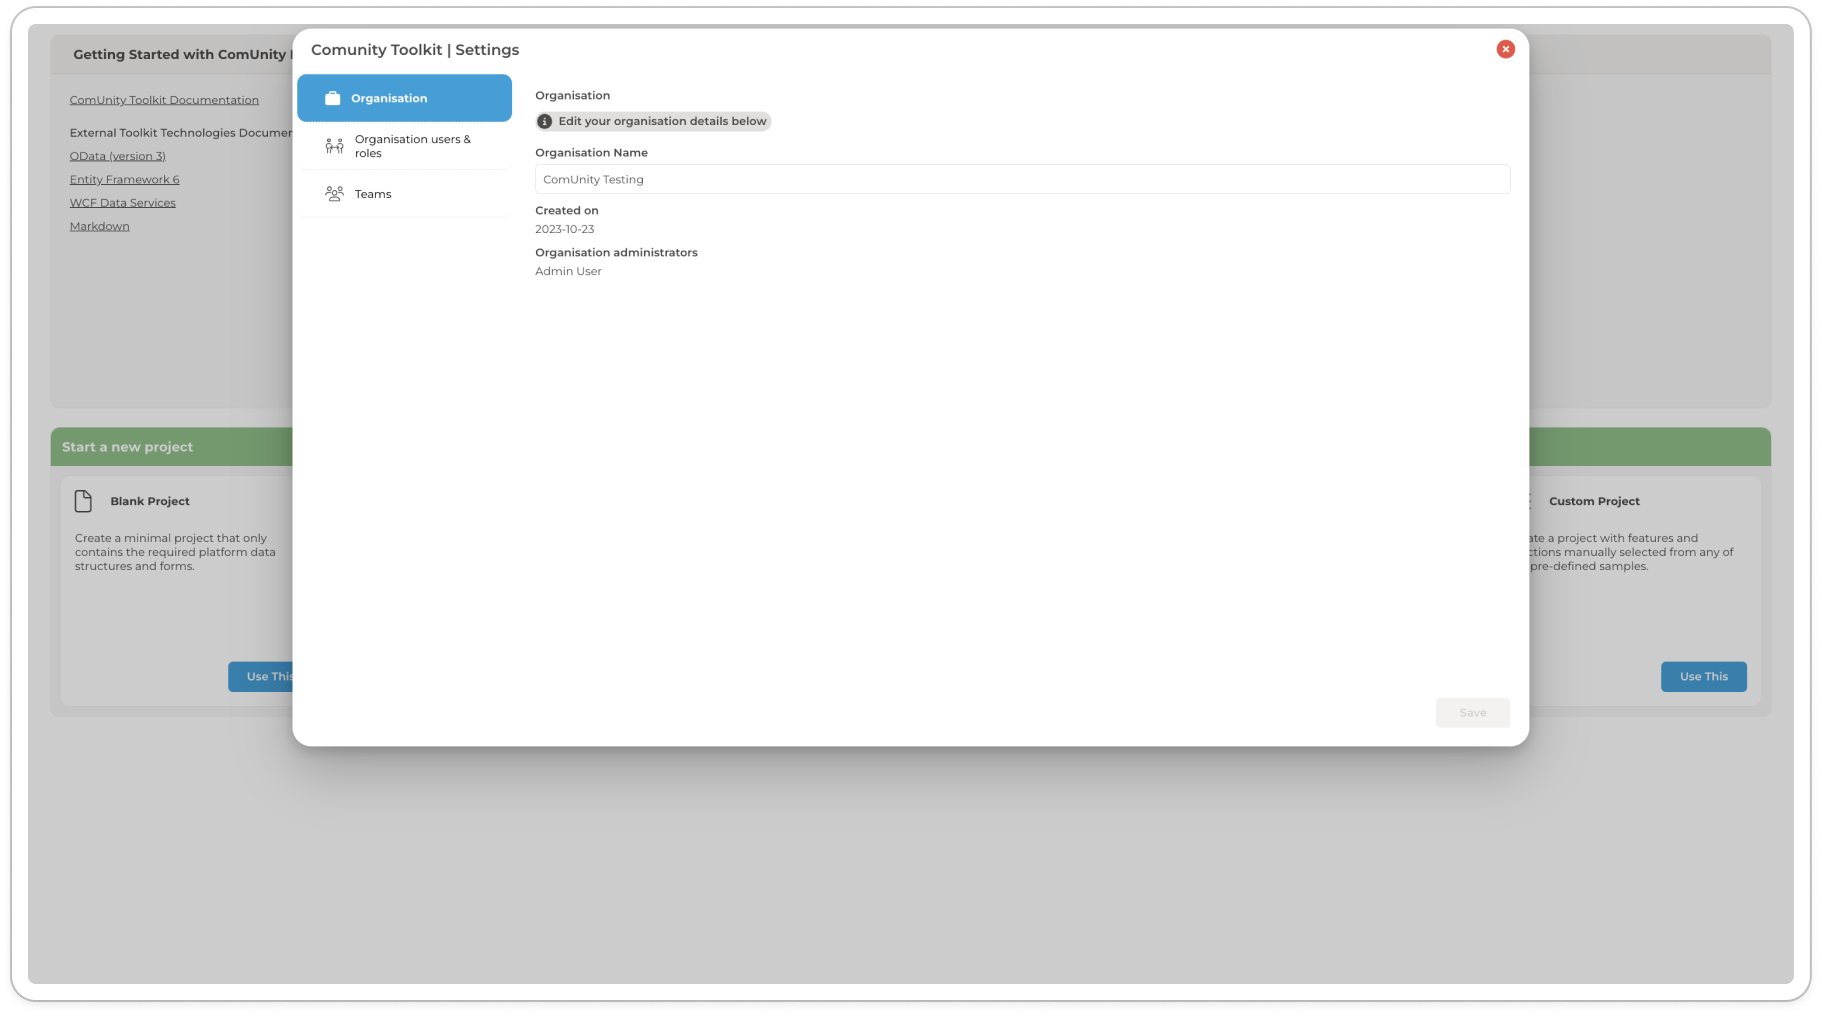
To access and modify your organisation's details, follow these steps:
Organisational Settings can only be accessed by admins due to the role-based access control enforced in the Toolkit. For any other role, these settings are hidden.
Log In: Sign into the Toolkit with your credentials.
Access Organisation Settings: From the main menu, navigate to "Organisation Settings".\
View and Edit Details: Here, you can view your organisation's information and edit details such as the organisation's name.
To manage users and their roles within the organisation, proceed as follows:
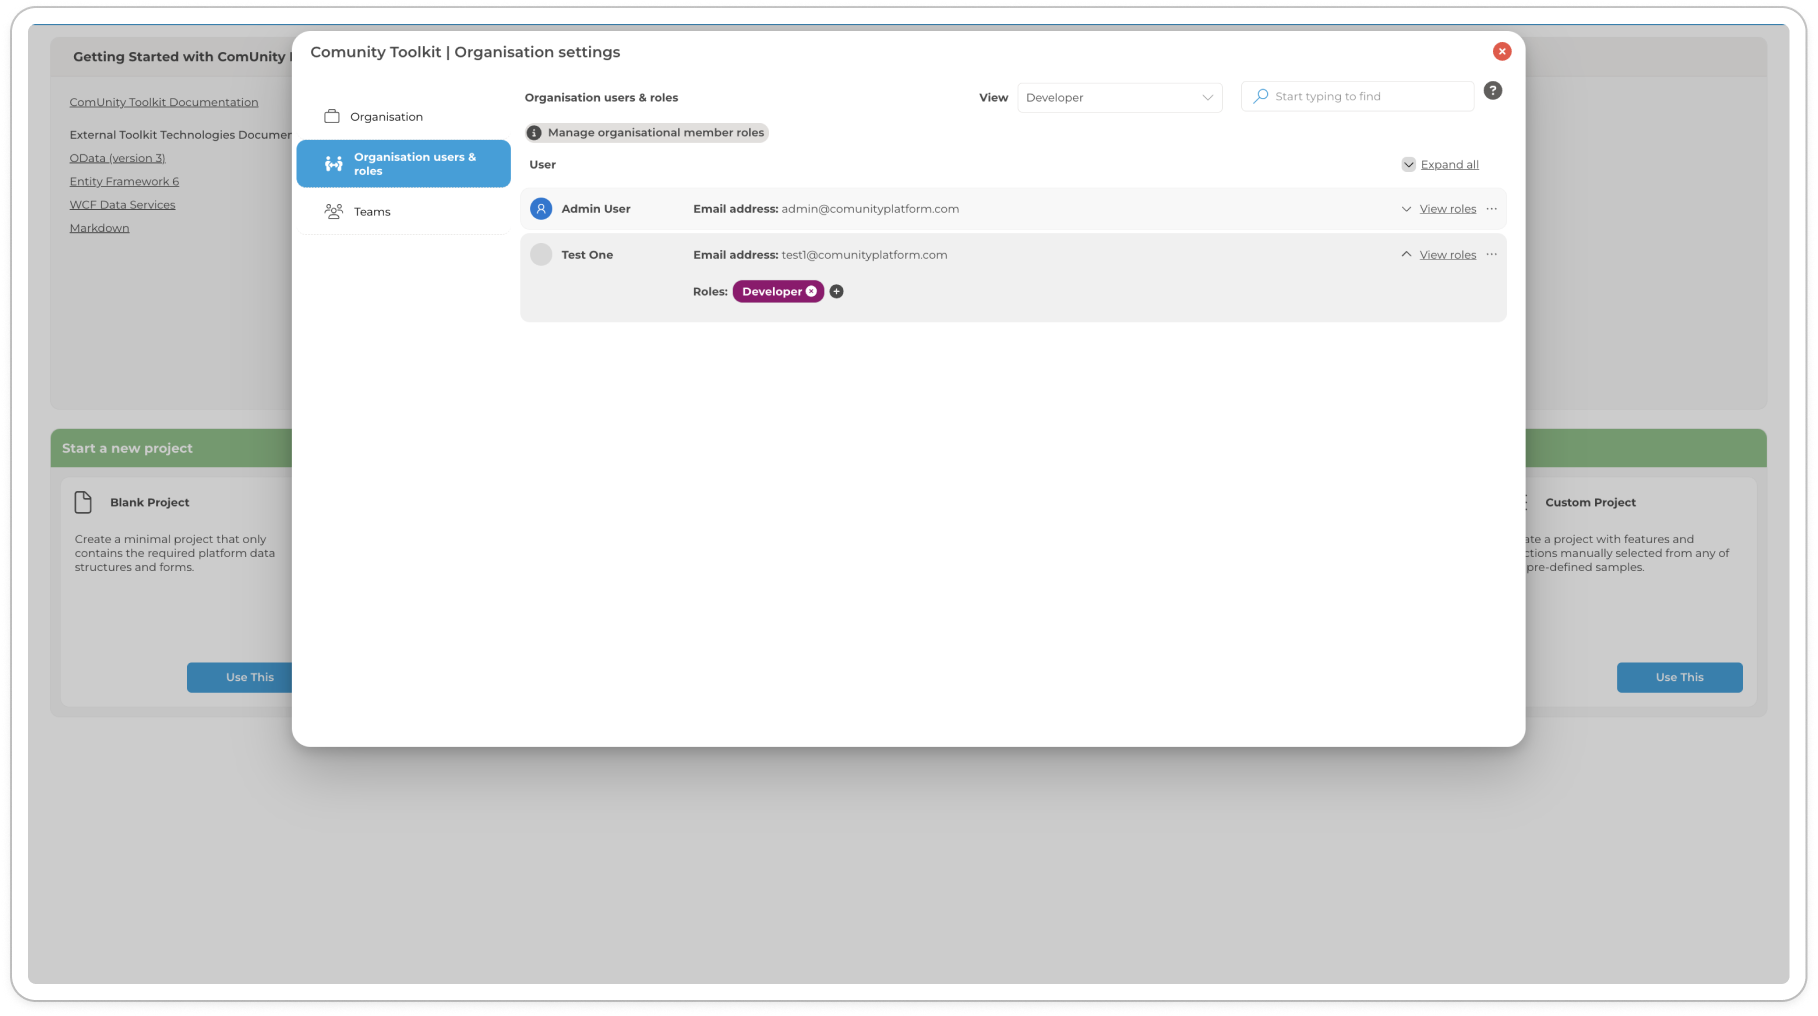
Access Organisational Settings: Go to the "Organisation users and roles" tab within the Organisational Settings.
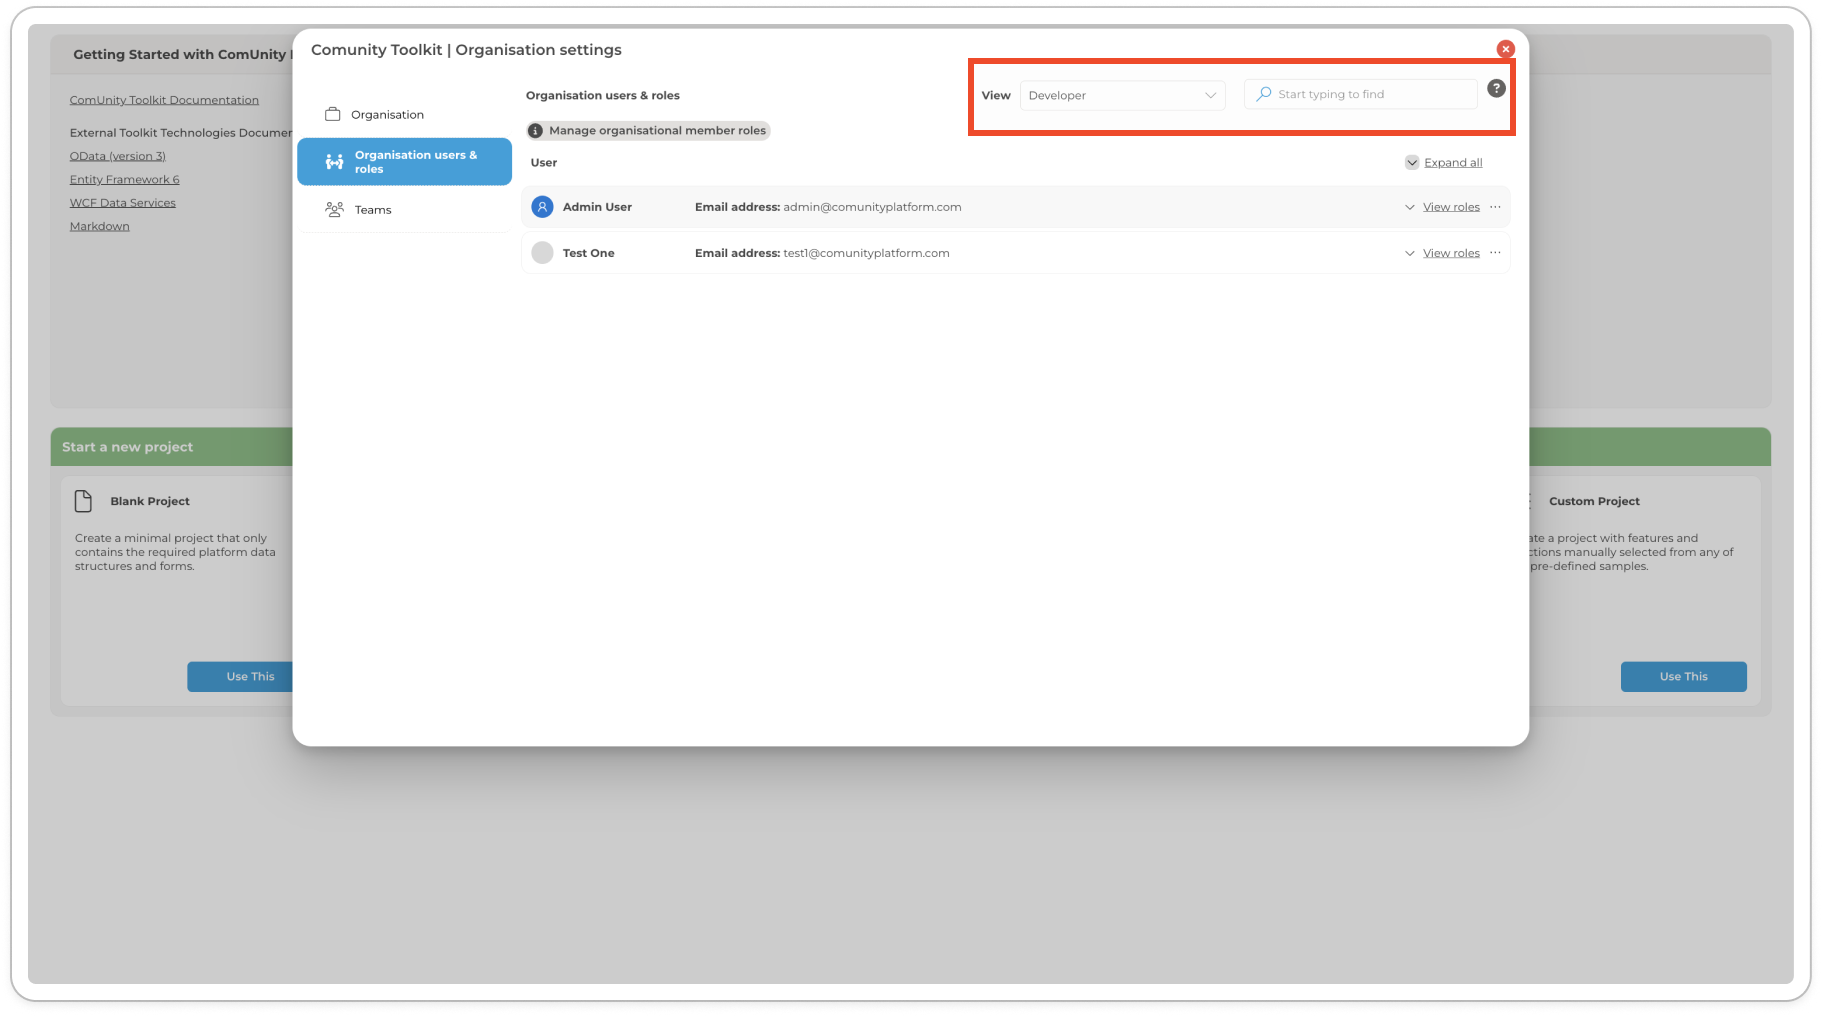
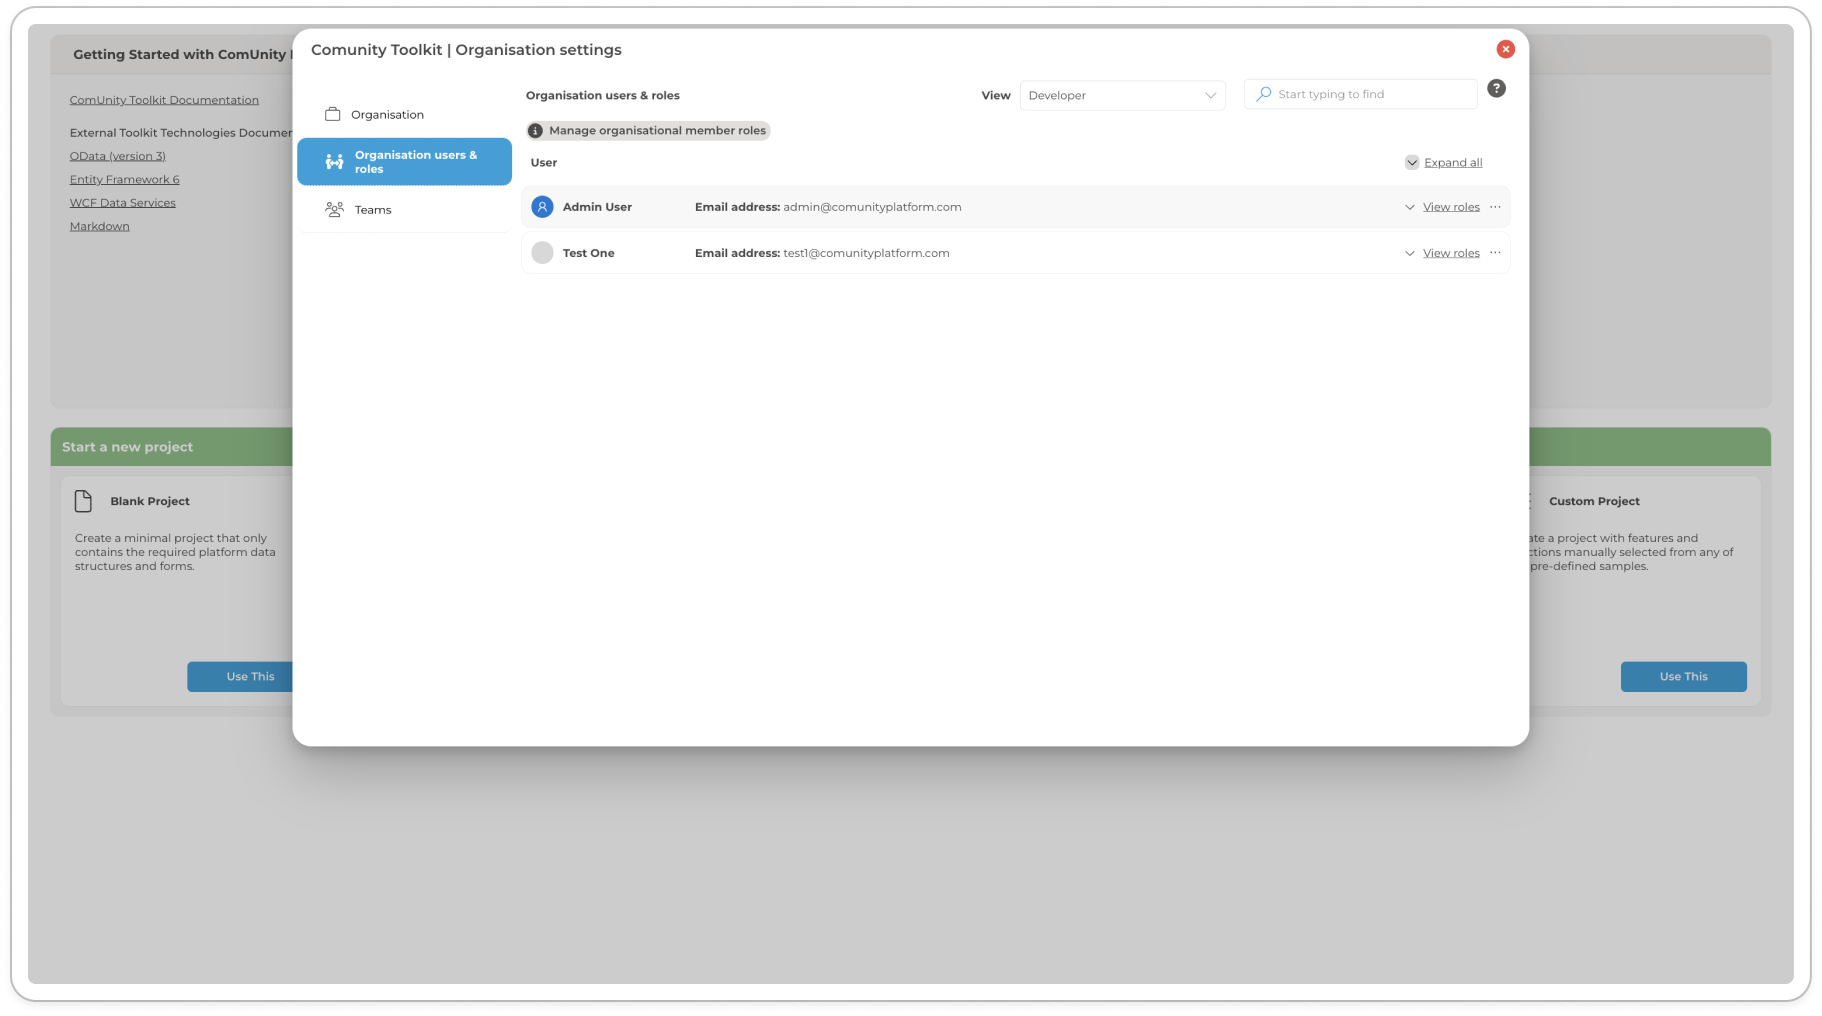
View Users: This section displays all users associated with your organisation. Use the search functionality to find specific users and the view functionality to find users by role.
This section outlines the default user roles supported in the Toolkit. The roles manage access to various components and functionalities within the system. Permissions are environment-specific, and access rights range from 1 to 3.
Default Roles
Lead Developer
Developer
Operations
Each role has specific permissions across the development (DEV), quality assurance (QA), and production (PROD) environments.
1: View only
3: Full access (view and edit)
To learn more about environments, please refer to the section.
1: View only
3: Full access (view and edit)
To effectively manage teams in the Organisation refer to.
By following these guidelines, the Organisation Administrator can effectively manage the organisation's structure and member roles within the Toolkit, ensuring a streamlined and efficient operational environment.
Organisational Control: Having full visibility into all projects, reassigning project ownership as needed, and modifying team structures to optimise collaboration.
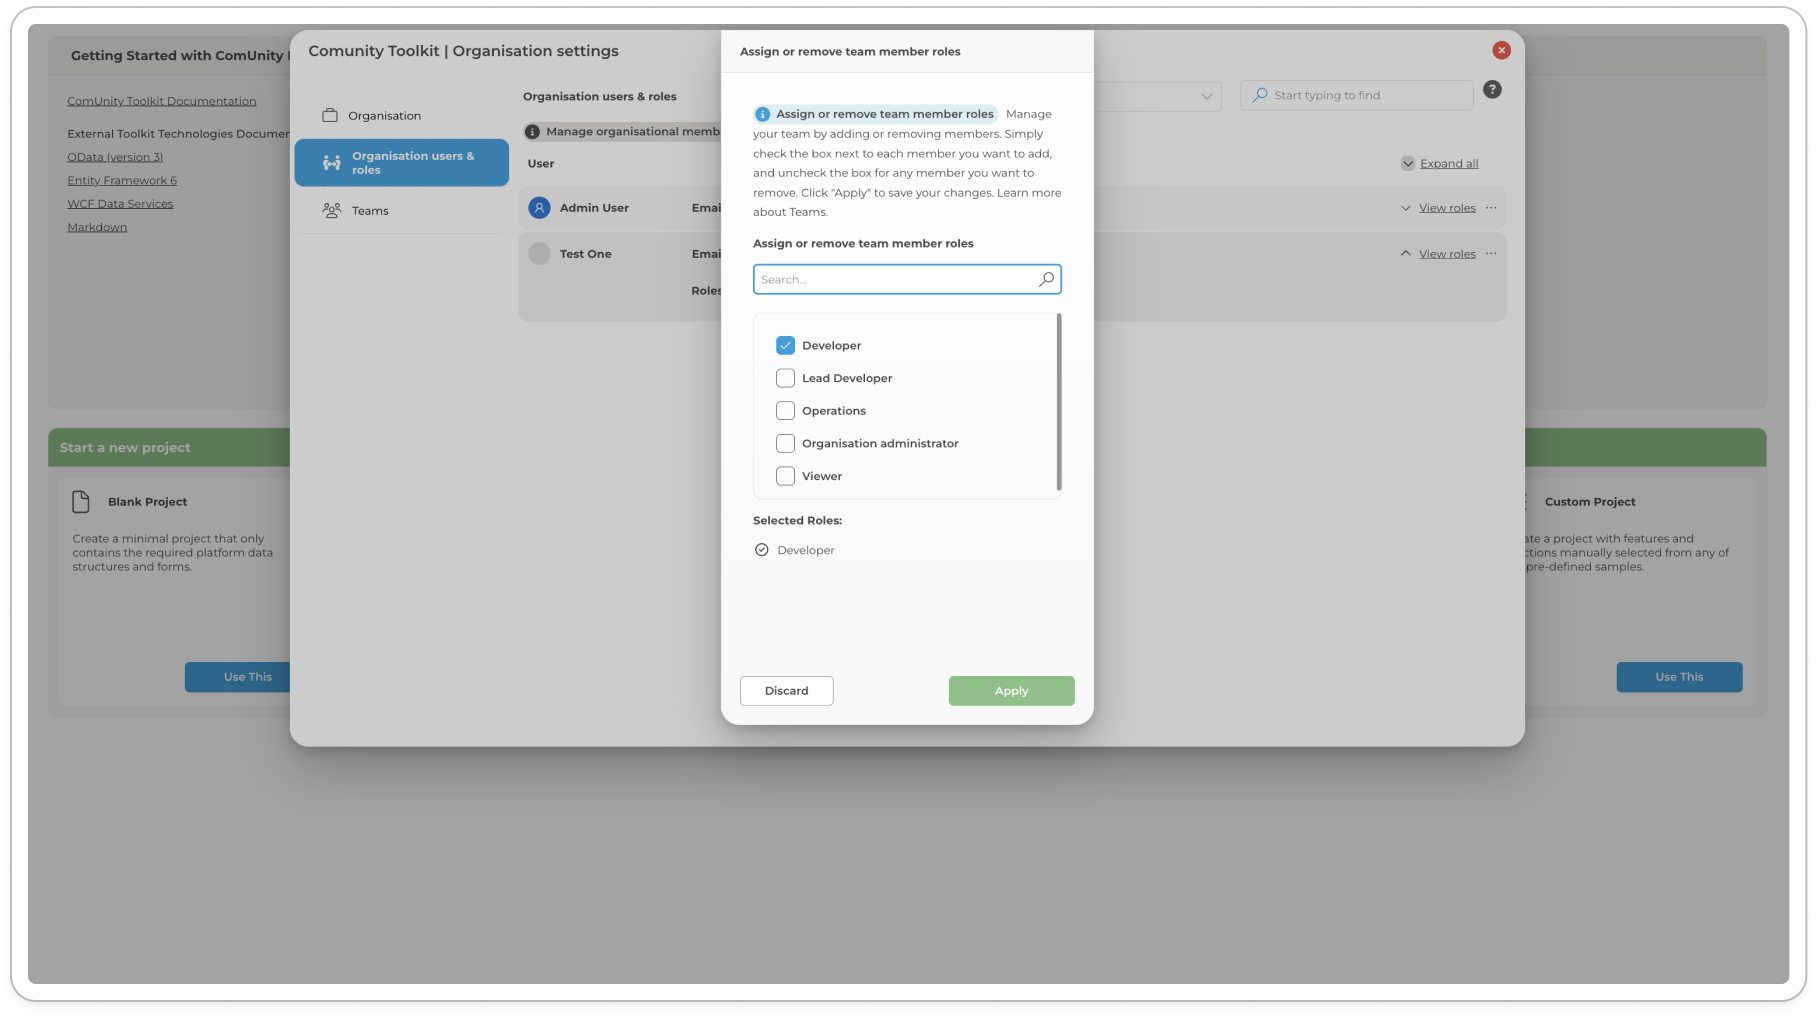
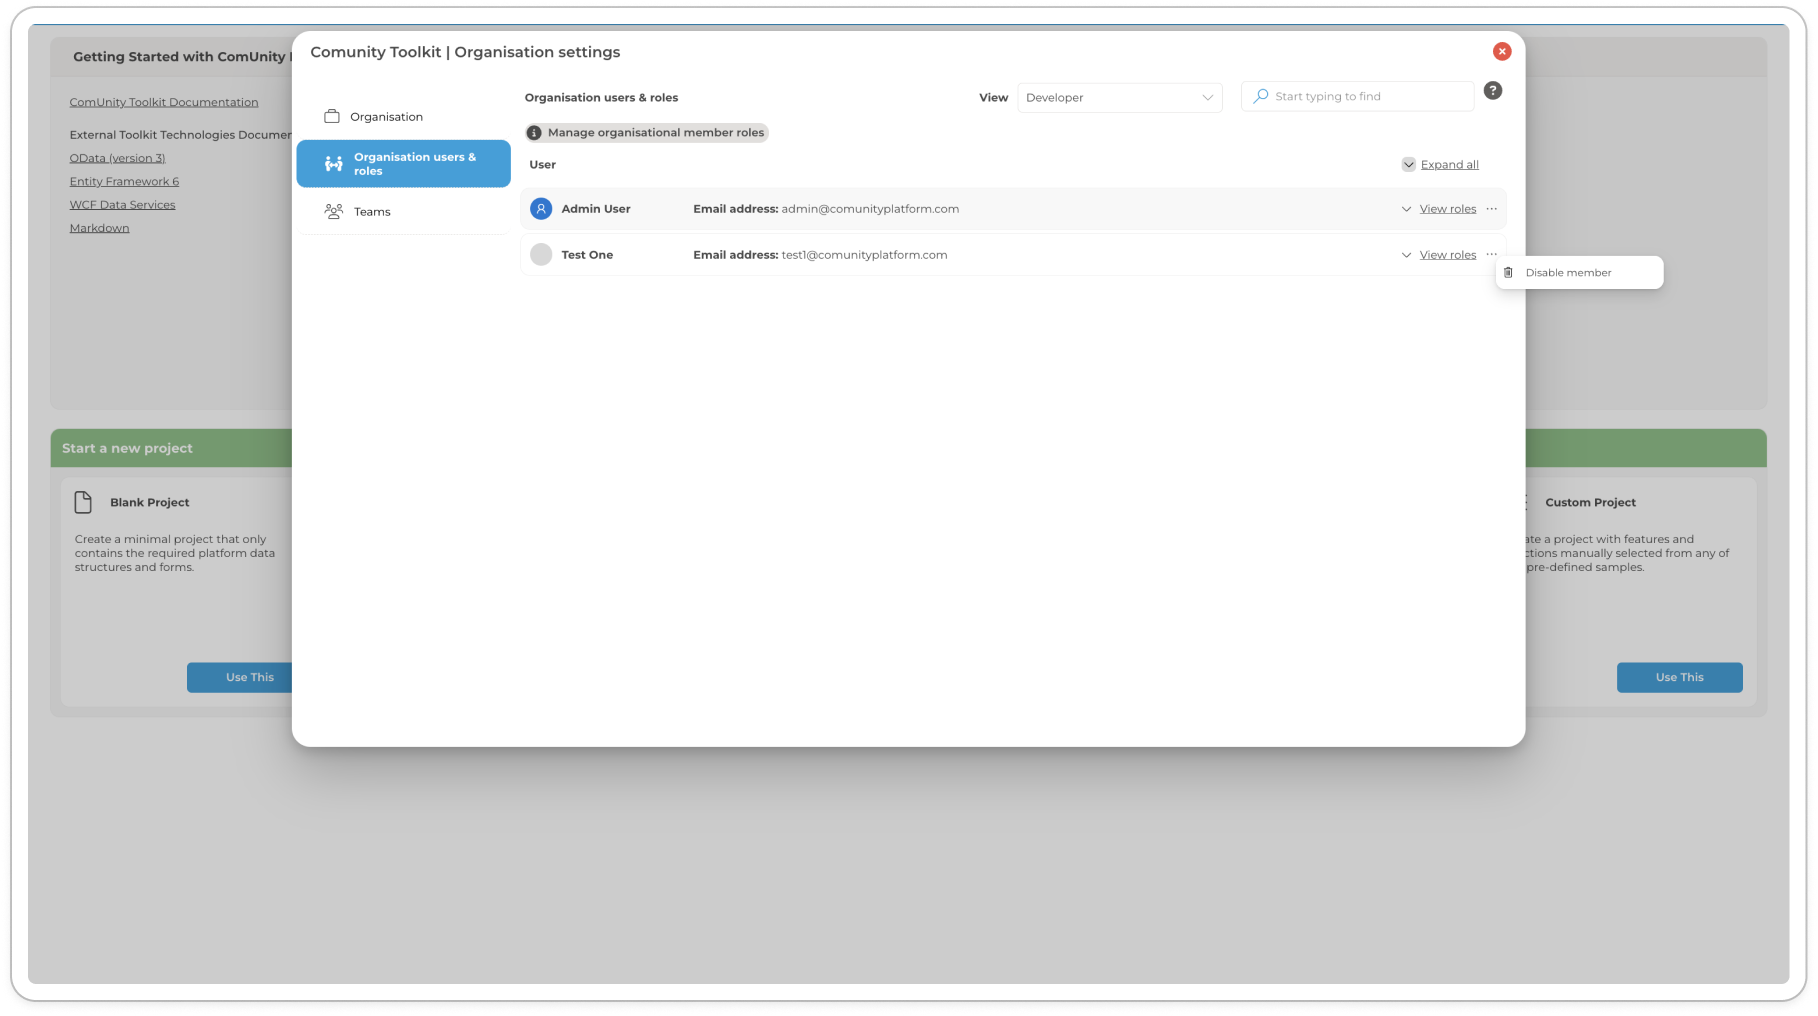
Manage User Roles: To adjust user roles, click the "View Roles" button next to the respective user. Use the (+) button to assign or remove roles. For more information about the supported roles and their permissions, please refer to the Supported Roles and Permissions section.
Assign/Remove Roles: Click the plus icon in the Roles assigned to the user, an "Assign or remove team member roles" modal will appear**.** In the "Assign or remove team member roles" modal, check or uncheck roles to assign or remove them, respectively.
Apply Changes: Click "Apply" to save your modifications.
Download Backup
DEV
Full (3)
Environment Settings
DEV
Full (3)
Environment Settings
PROD
Full (3)
Environment Settings
QA
Full (3)
Operate
PROD
Full (3)
Operate
QA
Full (3)
Project Settings
DEV
Full (3)
Project Settings
PROD
Full (3)
Project Settings
QA
Full (3)
Communications
DEV
Full (3)
Custom Classes
DEV
Full (3)
Custom Website
DEV
Full (3)
Data
DEV
Full (3)
Integrations
DEV
Full (3)
Observability
DEV
Full (3)
Observability
PROD
Full (3)
Observability
QA
Full (3)
Screens
DEV
Full (3)
Deploy to QA
DEV
Full (3)
Deployment history
DEV
Full (3)
Deploy to Production
QA
Full (3)
Deployment history
QA
Full (3)
Operate
PROD
Full (3)
Operate
QA
Full (3)
Observability
DEV
Full (3)
Observability
PROD
Full (3)
Observability
QA
Full (3)
Download Backup
DEV
View (1)
Operate
PROD
View (1)
Operate
QA
View (1)
Communications
DEV
View (1)
Custom Classes
DEV
View (1)
Custom Website
DEV
View (1)
Data
DEV
View (1)
Integrations
DEV
View (1)
Observability
DEV
View (1)
Observability
PROD
View (1)
Observability
QA
View (1)
Screens
DEV
View (1)
Build & Launch
DEV
Full (3)
Deploy
DEV
Full (3)
Deploy
QA
Full (3)
Develop
DEV
Build & Launch
DEV
Full (3)
Deploy
DEV
Full (3)
Deploy
QA
Full (3)
Develop
DEV
Environment Settings
DEV
Full (3)
Environment Settings
PROD
Full (3)
Environment Settings
QA
Full (3)
Develop
DEV
Build & Launch
DEV
View (1)
Deploy
DEV
View (1)
Deploy
QA
View (1)
Develop
DEV
Full (3)
Full (3)
Full (3)
View (1)
Responsibility and Prerequisites:
The task of assigning managing teams to a project is entrusted to the Organisational Administrator.
To manage teams in the organisation, proceed as follows:
Login to the ComUnity Developer Toolkit
Access Organisation Settings: From the main menu, navigate to "Organisation Settings".
Access Teams: Go to the "Teams" tab within the Organisational Settings.
View Teams: This section displays all teams in your organisation.
Create a Team:
To establish a new team, click the "+ Create Team" button.
In the "Create Team" modal that appears, enter the team's name and confirm the creation.
View Team Members:
For details on a specific team, click the "View Team" button adjacent to the team's name.
A detailed view of the team members along with their roles will be displayed. Utilise the search function for an enhanced experience in finding specific members or roles.
Delete a Team: To delete a team, click the three-dot button next to the team's name and confirm the action in the "Delete Team" modal.
Responsibility and Prerequisites
The task of assigning teams to a project is entrusted to the Project Owner. Before proceeding, ensure that the necessary teams have already been established within your organisation. This step requires collaboration with the Organisational Administrator, who is responsible for creating teams and assigning members to those teams.
In the Toolkit, the flexibility of project management is enhanced by allowing Project Owners to assign teams not only after a project has been established but also directly during the project creation phase. This capability streamlines the setup process, ensuring that the right resources and teams are aligned from the outset.
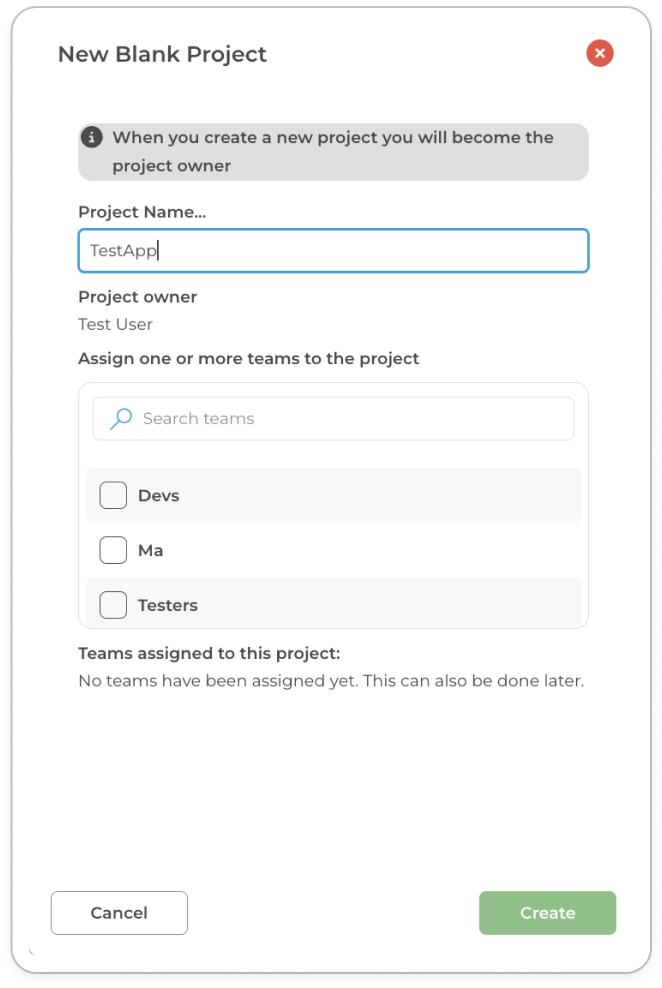
Assigning Teams During Project Creation
Initiate Project Creation: When creating a new project within the Toolkit, fill out the project details as prompted.
Team Assignment Option: Look for the "Assign one or more teams to the project" section within the project creation interface. This step occurs before finalising the project setup.
Select Teams: Choose from the list of available teams within your organisation. If the required team is not listed, remember that the Organisational Administrator can create and configure new teams.
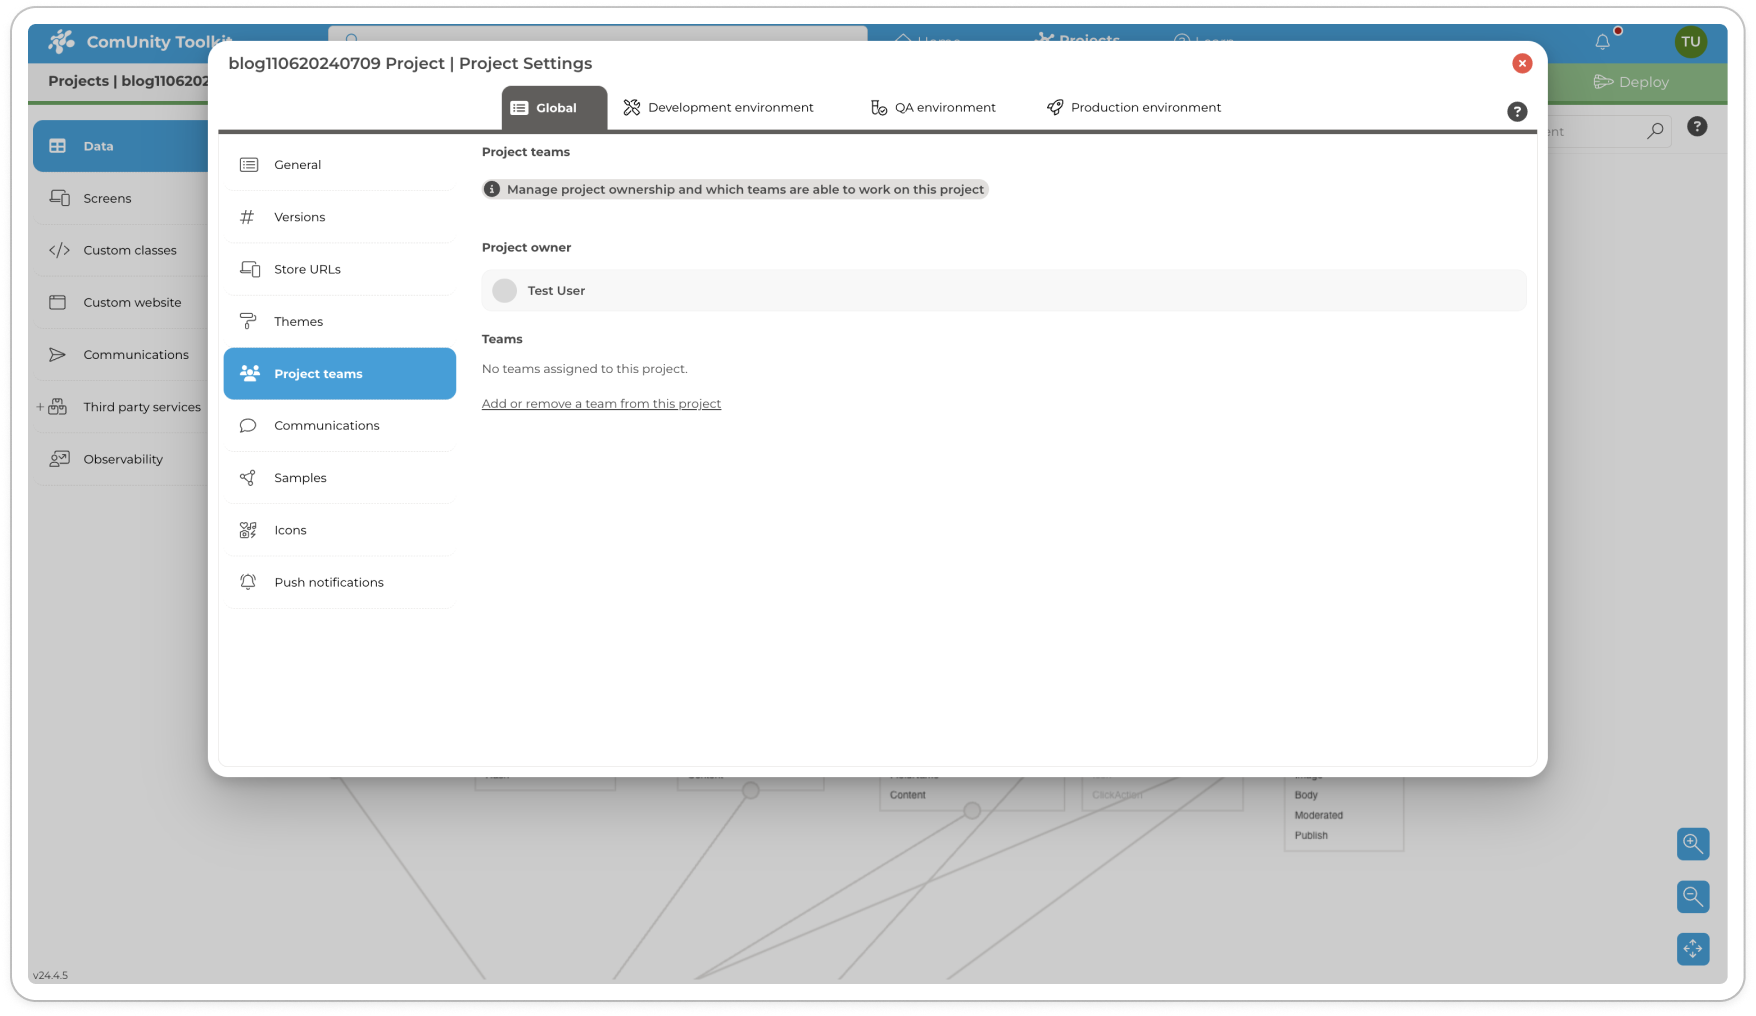
Assigning Teams to an Existing Project - Project Teams
For Project Owners looking to assign teams to an already existing project:
Login to the ComUnity Developer Toolkit
Select your Project: From the dashboard, select the project you wish to manage.
Open Project Settings: After opening your project in the Toolkit, click the cog icon labelled Project Settings (displayed with a tooltip reading “Project settings”). For additional details on accessing Project Settings, refer to the section.
The ability to customise team assignments allows Project Owners to align staffing with the necessary expertise and skills for successful project execution.
Finalise Project Creation: After selecting the desired teams, proceed to complete the remaining project details and finalise the creation process.
Navigate to Project teams: In the Project Settings window, select "Project teams."
Modify Team Assignments: Click on "Add or Remove a Team from this Project" to adjust your team assignments.
To include a team in your project, check the box next to the team's name.
To remove a team from your project, uncheck the box next to the team's name.
Multiple Team Assignments: Remember, it's possible to assign multiple teams to a single project, enhancing collaboration and resource allocation.